Types of trekking poles
Trekking poles, don’t be surprised, are often sold individually. There are, of course, paired sets. However, you must agree - it is very convenient! The sticks are quite fragile to break, and in case of serious damage, you can buy one. I think it's great.
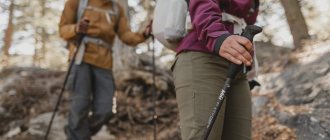
Trekking poles improve your stability and can reduce the stress on your knees during hiking and hiking. Most are adjustable in length, and some include internal springs that absorb shock to reduce stress on your hands. (ANTI-SHOCK)
How long should trekking poles be?
Poles recommend bending your elbows at an angle of 90 degrees. This will be the ideal length of trekking poles. Many trekking poles have adjustable lengths, making customization and customization more accessible. However, they also come with a fixed length or a limited range of sizes. Here are some tips for you:
For trekking poles with adjustable length:
- If you are taller than 180 cm, choose trekking poles with a maximum length of at least 130 cm.
- If you're shorter than 180cm, you'll be able to shorten most adjustable trekking poles to make them work for you.
For fixed length trekking poles :
Use the table below
| Height | Suggested Pole Length |
| <155 cm | 100 cm |
| 155 – 170 cm | 110 cm |
| 170 - 180 cm | 120 cm |
| 180 cm + | 130 cm |
Adjusting the height of the poles
If you have trekking poles that adjust in length, it is important to know what height to set them to. Improperly adjusted trekking poles can cause harm to your arms, shoulders, back and neck. And they would rather hinder than help.
Adjust the length so that when you hold the trekking pole with the tip on the ground near your foot, your arm bends 90 degrees at the elbow. This will be the right length for most of your hikes.
If you have poles with three sections (knees), I recommend setting the top adjustment so that it is in the middle of the adjustment range, and then setting the bottom adjustment to a length that puts the arm at the correct angle. Then, if you need to make adjustments while hiking, you can only use the top adjustment to fine-tune the length. In addition, this option will make your trekking poles more resistant to breakage.
For long uphill climbs, you can shorten each pole by about 5-10 cm to get the correct and comfortable length. The steeper the slope, the more you shorten your trekking poles. Your trekking poles should help you move uphill without causing tension or fatigue in your shoulders. Remember - your shoulders should never feel like they're in an unnatural, elevated position or like they're being pushed into the straps of your backpack. If this is the case, you need to cut your sticks even further.
On a long descent , try extending each pole about 5-10 cm from the length you set it to on flat ground. This will keep your body upright for better balance.
If you are on a long slope (like a slope traverse), you can shorten one pole and lengthen the other as needed to improve comfort and stability.
How to Adjust the Length of Trekking Poles
When buying poles, pay attention to the growth and weight, the weight of the backpack and the terrain of the route. The length of the sticks can be determined using the formula: height multiplied by 0.7.
Before use, you first need to adjust the length and fix it very well so that there is no vibration. When walking, make the angle at the elbow 90 degrees. It is necessary to adjust the length of the poles so that you can stand straight when descending.
Note! On telescopic poles there are special marks on the sections with which you can adjust the length to the desired height. Length adjustment can be stepped or stepless.
Features of trekking poles - types of poles
Adjustable: Many trekking poles are adjustable in length to increase stability on different terrains. They usually range from 60 to 130 cm in length. This is convenient if your hike involves rough terrain with ups and downs. Cons - any mechanism can break.
Non-adjustable: These trekking poles are not adjustable in length. These poles are lighter than adjustable poles because they have fewer parts. And light travelers love them for it. These poles are great for events where you know you need a certain height. The downside is that it may be inconvenient to transport.
Collapsible: Collapsible trekking poles act like tent poles rather than folding into themselves like adjustable poles. Folding trekking poles tend to be the most “collapsible” and are often very lightweight. In addition, they quickly turn into a working position. They are especially popular among ultra-runners and fast hikers. There are not many such models on our market, but they still appear.
Shock-absorbing supports . They have internal springs that absorb shock when descending. ANTI-SHOCK is most often written on the stick. On many poles this feature can be turned off when it is not needed, for example when you are walking uphill. Shock absorption is a good feature for any hiker, but is especially recommended if you have had problems with the joints of your hands, knees, or feet.
Standard supports: they do not have shock-absorbing properties and are therefore lighter and cheaper. However, they provide the same level of balance and support as shock-absorbing poles.
Ultralight: Ultralight poles have the advantage of being lighter. On a long hike this means less strain on your arms. Ultralight poles are also easier to pack. These include sticks, a pair of which does not exceed 450 grams.
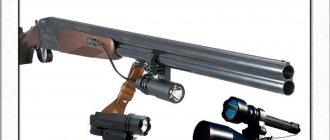
Camera Mount: Some trekking poles include a built-in camera mount under the handle, allowing you to use it as a monopod.
What are the differences between trekking poles?
A person who has no idea about trekking poles will not be able to immediately distinguish them from ski poles and poles for alpine skiing.
The main difference: design, handle (handle), lanyard (strap), profile, tip, ring, shock absorber.
Trekking poles are special products for climbers and various travelers; they can be distinguished in several ways.
- Hiking. Traveling through familiar terrain in the mountains. For such a rest, the poles should be light.
- Trekking. An option for an unusual holiday, such as mountaineering, trekking and other types of active recreation.
- Bepeking. A walk, that is, a hike, an excursion, or just a regular vacation, for example, fishing.
Telescopic design
The telescopic design of trekking poles consists of several sections of different sizes: wide at the top, narrow at the bottom. When folded, the narrow part fits into the wide one. They can be fixed in the desired position using a locking mechanism, that is, the length of the sticks can be adjusted.
For some devices, you can adjust the length at each joint of the elements: if the stick is assembled from three sections, then it can be adjusted in two places. Some devices have two folding positions: folded/unfolded. Such poles are fixed using buttons on the side and the length is adjustable only on the upper section.
The advantages of the telescopic design: versatile, comfortable, durable, you can easily adjust the length to suit any height on the go.
Disadvantages: long when folded (from 60 to 65 cm) and heavy, the weight of one pair is 500–700 grams.
Foldable design
Folding trekking poles, assembled like a tent frame. There is a cord stretched inside the tubes, which holds all the connection elements. To fix them in the desired position, the cord is pulled through the handle and the tubes are inserted into each other.
The advantage of a folding device: light and compact. Their weight when disassembled is 350 grams, and their length is 34 cm. But tourists are not advised to purchase such poles for serious travel. They are not durable and break. Folding poles are not so popular. The length of the poles is not adjustable, like telescopic ones. Such products come in three and four sections.
Disadvantages: fragile, fixed length. But if you choose the right length, there will be no problems when walking.
Black Diamond's most popular folding trekking poles.
Trekking poles with clutch
The most important part of the mechanism is the clutch, a device with which the length of the stick is adjusted. The collet version has been used since its release until today. Sections can be secured to the selected size using a rotating mechanism. The mechanism itself is installed inside the stick, it cannot be damaged.
Note! The design of cheap models is entirely plastic; aluminum bushings are rarely used.
In such products, the thread wears out quickly and cannot be restored. And if water or dirt gets into the stick, it will not be fixed. To prevent this, you need to clean the mechanism more often; in severe frost it does not freeze.
Trekking poles with lever clamp
This model appeared on the modern market in the late 90s, manufactured by Black Diamond. Even with thick textile gloves, you can easily adjust the length of the poles. Since their release, frost-resistant plastic has been used for the clamp; today they are produced with a metal clamp.
When adjusting, the clamp does not require much effort; everything is done very easily. This model is durable and suitable for traveling in difficult terrain.
Trekking pole locking mechanisms
Whether they are adjustable in length or not, all trekking poles have locking mechanisms to keep the set length from slipping during use. Most trekking poles use one of these four types of locking mechanisms:
External Lever Lock: A lever-based clamping mechanism that allows for quick and easy length adjustment, even while wearing gloves.
Push Button Locking: Poles with this locking mechanism snap and lock in one motion. Press the button to release the lock and fold the knee.
Rotary Lock: Uses expander and screw installation, which is strong and durable. However, from time to time it jams, you have to clean it and lubricate it with oil. To do this, simply remove your knee from the stick.
Combination Lock: Some poles use a combination of multiple locking mechanisms to achieve a balance of strength, light weight and ease of use. For example, a stick may have an external lever lock on the top knee and a pivot lock on the bottom.
History of trekking poles
People began to travel a long time ago; they tried to overcome long distances and hard-to-reach places. To make walking easier, I had to pick up a stick. And now, centuries later, the image of a wanderer with a staff has returned to us, but only in modern trekking style, trekking poles.
The word “trekking” means “nomadic” in Dutch. This name represents a ski pole where the length can be adjusted.
Officially, the first trekking poles were released by the German company Leki in 1974. The first design of the products was made of several elements, which were made up of individual parts of the pipe and were fixed in the desired position using special fasteners.
Materials for trekking poles
The composition of the shaft is a key factor in determining the overall weight of the stick, as well as its strength.
Aluminum: Aluminum poles tend to be more durable and economical, weighing between 400 and 600 grams per pair. Actual weight (and price) may vary slightly depending on pole width - 12 to 16mm. Under high loads, aluminum may bend, but is unlikely to break. The main enemy of such a stick is lateral deformation. For example, when the nose of a stick gets stuck in the stones, and you continue to push it forward. Avoiding this will take a little time and experience.
Composite: Made entirely or partially from carbon. A lighter and more expensive option. Sticks weigh on average from 300 to 500 grams per pair. They dampen vibration well even without shock absorbers, but under high loads carbon fibers are more vulnerable to destruction than aluminum ones. If you are hiking in difficult to reach areas, this is something to keep in mind.
Trekking pole material
Aluminum
In the manufacture of products, grade 7005 aluminum is used. The most famous, durable and lightweight. This grade of metal is used only for the production of expensive high-end models. Cheap products are made of simple aluminum.
This metal has no disadvantages. Poles made from this material are suitable for hiking in rocky and mountainous areas, as well as for heavy backpacks.
Light alloys, titanal
Titanal is an alloy of aluminum and titanium. It is lighter and more reliable than aluminum. Products made from such material are expensive. The manufacturer produces models in limited quantities.
Carbon fiber (carbon)
Products made from this material are produced by world famous companies. This is the only material that has the highest strength qualities. Poles made of carbon are lightweight but expensive.
They need to be treated with care; they do not withstand sharp shock loads well, but compared to aluminum, they do not lose their shape when interacting with a hard object. Products made from such material should not be used in unusual conditions, for overweight people or for heavy backpacks. Recently, the demand for carbon models has increased in the market.
Durability, design length of trekking poles
The main characteristics of the strength of products are lateral load and vertical load. The vertical load depends on the assembly quality of the sections. Loading the main weight when walking is considered normal, unless when you lose balance you lean against a stick, the load is already greater.
High-quality products can withstand a vertical load of at least 55 kg. The most durable poles are considered to be 7075-T6 aluminum poles with a section diameter of 18-16-14 mm.
The length of the products can be fixed, but it can also be adjusted from 65 cm to 145 cm; they can be used by a tall person with a height of 190 cm. Some companies have not ignored their short clients. They produce special types of poles for women. Features: lightweight and compact.
| Standard length - 140 cm | shortened – 120 cm | |
| Height | 190 cm | 165 cm |
| Unassembled length | 65 cm | 57 cm |
| Weight | 560 grams | 520 grams |
Types of trekking pole handles - how to choose
Almost all modern trekking poles have ergonomic, comfortable handles that provide a tilt angle of 15 degrees. This allows you to keep your wrists in a relaxed and comfortable position. Additionally, some hiking poles have handles that look similar to the handles of a walking stick (horizontal extension). This shape provides good support for everyday walking or very light hiking.
Handle materials
The material of the handles determines how well the trekking poles will fit in your hands, as well as their thermal insulating properties.
Wooden Cork: Resists moisture from sweaty hands, reduces vibration and best fits the shape of your hands. If you sweat a lot or plan to walk in hot weather, use cork handles.
Foam: Absorbs moisture from sweaty hands and is the softest to the touch. Does not have the property of rubbing hands.
Rubber/Plastic: Protects hands from cold, shock and vibration, making it best for cold weather hiking. However, it is more likely to chafe and does not wick moisture away from your palms at all, making it less suitable for warm weather hiking.
Tips for use
A few life hacks for using trekking poles:
- When walking with poles with an anti-shock system, try not to push the pole, otherwise the entire load will be on the joints.
- During movements, you need to install the stick securely; under load, it can break and cause injury.
- Don't buy cheap products, expensive ones will last longer.
- In cold weather, you need to reduce the length of the poles; to improve blood circulation, the hands should be below the elbows.
- You need to put the lanyard on your wrist correctly. For safety, you should not wear it on steep slopes, when walking on ice, in dangerous places on the mountains, or on rocky terrain. It's better to drop a stick than to injure your hand.
- When ascending, the length of the pole needs to be reduced, and when descending, adjust the longest length.
Additions to trekking poles
Wrist straps (lanyard): It's actually quite common to see hikers using lanyards on their poles incorrectly. To use them properly, slide your hand up through the bottom of the strap and then pull down and grab the handle of the stick. This technique supports your wrist and the base of your hand, allowing you to keep your hand relaxed. In addition, this provides additional shock absorption, which puts less strain on your hands.
You can adjust the length of the strap so that when you place your hand on the strap, it lines up with where you want it to rest on the handle. Properly adjusting the strap allows you to release the stick to take a photo, drink water, or adjust your backpack, and then easily grab the stick where you need it.
Note that many trekking poles have special right and left straps, and some have padded or padded straps to prevent chafing.
Rings: Hiking poles usually come with wide rings. They are convenient to use on a snowy path or in mud.
Pole
Tips : Carbide or steel tips are commonly used to provide traction on rock and ice. Protective rubber tips extend the life of the tips and protect your equipment during transport from sharp pole ends. Angled rubber running tips (usually sold separately) are designed for use on asphalt or other hard surfaces.
With
Fortunately, learning to walk with poles is not difficult. A few minutes will be enough for you to master the technique.
Alternating sticks and legs
Most tourists keep this rhythm of movement - right foot and left pole, left foot and right pole, etc.). If you don't get into that rhythm, just keep walking while lifting your poles off the ground. Start again as soon as you are ready. Soon it will become completely natural and you won't even have to think about it.
Double stop
Sometimes you may need to push both poles at the same time and then take two steps, reinstall both poles and continue. This can be useful on steep climbs or descents where you need the stability of both poles at the same time.
Walk naturally
When using trekking poles, it is best to walk naturally, no matter how it sounds. Maintain a natural arm swing, as if you had no sticks in your hands. The poles can be angled slightly behind you so that when you stick them in you can push off to help your forward movement
Overcoming obstacles with trekking poles
Trekking poles can be very useful when you encounter obstacles on the trail. More life hacks in our VK group
Crossing Streams and Rivers: Trekking poles provide much-needed stability when you need to ford a river. Make sure that each time you stick your stick in, it is securely attached to the bottom before moving forward. If the water is deep, lengthen the poles.
Puddles: You can maneuver around them using the poles for stability, or you can pole vault to the other side by getting a comfortable support with your poles
Large Rocks: For lifting and negotiating large rocks, poles can help you. To do this, stick both sticks into the ground and, as you climb onto the rock, support yourself on the sticks.
Logs: To step over a log, simply stick sticks into the ground and use them for added stability. If you're walking on a log to get across water, you can use poles to improve your balance (think of a tightrope walker using a large pole for balance).
When crossing any dangerous areas (ford, rocky slopes), loosen the lanyards, or remove your hands from them. If you fall, this will help avoid dislocations, sprains and fractures.
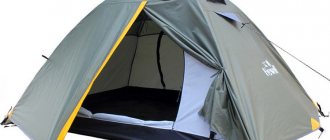
Using Trekking Poles to Set Up a Tent
Some lightweight tents require trekking poles to set up properly. They are used instead of the frame and arches. A very convenient thing for light vehicles.