- August 29, 2018
- Equipment
- Human
Fans of sniper or hunting often wonder about camouflage. One of the best solutions is the “Leshy” shaggy camouflage. It’s not difficult to create a hunting suit with your own hands, but you can buy it. If you purchase foreign-made camouflage, it will probably be designated “Gilli.” It's not very difficult to make. You can even make several different options.
Introductory information
There are three versions:
- Full set. Includes jacket with pants.
- Cape poncho.
- Jacket-hoodie.
The simplest is the second option. It’s not difficult to create such a “Leshy” camouflage coat with your own hands. The poncho cover is both comfortable and versatile. The most difficult option is a complete set, which consists of a jacket and pants. But it provides the best camouflage. Everyone is free to choose exactly what they like.
Suit material
When creating different versions of a costume, there are common points. Let's take a quick look at them. You should start with the necessary materials:
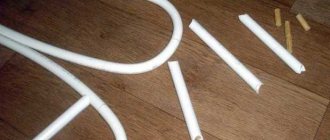
- Baby net. The more of it, the better. The fact is that part of it will have to be spent on experimentation in order to choose the best color for camouflage. Usually, 3-4 meters in length and one and a half width are enough for making a suit and preliminary work. The original color of the mesh used does not matter. But the cell size should be limited to the range of 1-2.5 centimeters.
- Jute thread. To obtain it, you can use brown bags designed for storing potatoes. Jute twine is not suitable because it is too stiff and thick. Considering that after painting and drying these properties will become even more pronounced, it will be extremely difficult to work with. Therefore, it is better to buy jute bags and pull out the required thread from them.
How to make a ghillie suit. Tips and Tricks
A ghillie suit is a type of camouflage clothing that not only blends in color with the surrounding area, but also blurs the silhouette of the wearer due to artificial elements. Similar equipment is used by snipers, hunters and photographers who specialize in photographing wildlife - camouflage helps equally well against detection by animals and people.
Technically, the ghillie suit is superior to regular camouflage clothing because it allows for blurring of the silhouette both in three-dimensional space and during movement.
Is this a useful thing for our survivalist brother? Definitely. Hunting and covert movement on the ground will immediately become much more effective with it. But is it necessary to buy such a suit? No, in our stores there are wonderful camouflage suits, such as the “Leshy” suit, but they are universal, which means they may not fit the specific features of the area very well.
Fortunately, you can make various camouflages yourself. If you have time, resources (not too expensive and rare), and also hands growing from the right place. Therefore, we will now tell you in general terms how to make a “shaggy sniper suit”.
The area in which you will use the ghillie
Before you start assembling the ghillie camouflage suit, you need to clarify an important point - in what conditions you are going to use it and where. “Forest” is a very multifaceted concept. And if your camouflage does not match the characteristics of a particular area, it will attract attention rather than deflect it. Therefore, you definitely need to go to the area where you plan to wear a disguise.
Take a camera to take color photos. This will allow you to understand which colors predominate in the landscape and how they are combined. This will also make your work easier, since you won’t have to remember the shape of the leaves and the length of the blades of grass.
You will also need a notepad and a set of colored pencils. To try to convey the general color scheme and combination right on the ground. Plus a pen to record observations.
Honestly, even the time of day can affect the effectiveness of using a protective suit, since the sun's rays, falling at different angles, illuminate the area differently. Therefore, photographs and sketches should be repeated 3 times - at noon, at dusk and at dawn.
These observations also have another benefit - you will become familiar with the features of the area and the vegetation growing on it. This is extremely useful, since something that you discover will help you in the further stages of making the ghillie suit.
Ghillie suit in 5 steps
To create a normal “ghillie”, you will need a few basic items of clothing (jacket for sure, pants optional, hat optional), mesh, fibers and lots and lots of paint. And even more patience. As practice shows, even from ordinary clothes you can get something quite decent.
However, it is better to use some cheap camouflage-colored clothing, which is found in abundance in various military stores. It doesn’t cost much, but by default it blurs the silhouette somewhat. You can, of course, take a regular jacket, but it will have to be additionally dyed.
In addition, you will need glue, transparent threads, sewing supplies, and samples of foliage and grass found in the area of intended use.
Now let's make a ghillie suit.
Step 1: Working with the Base
So, we take an old fishing net or camouflage net, cut it into thin strips, about five centimeters wide (about two “squares” of the net). The length is not important yet - it will be adjusted later. Place the stripes over your jacket and pants, and then use clear thread or fishing line to sew them to the fabric. This is a "note", so a few knots in key places will suffice.
Then take glue. And glue the mesh over the entire area directly to the material. At a minimum - a few drops every 5-7 centimeters. Then let the glue dry, after which you can adjust the length. The point is that the mesh should never lag behind the base clothing by more than 5-6 centimeters. And so that it stays over the entire area.
Step 2: Preparing the material for the strands
The main element of a camouflage suit is strips of fabric or individual bundles of fibers that cover almost the entire space. The fabric used to make coffee bags is quite suitable as a material. You will need approximately 3.5 kg of this material for work.
If you can't find a good burlap, braided jute twine will do. Or jute fabric. You can definitely buy them almost anywhere. The problem is that they have a specific color - further painting is necessary to achieve a camouflage effect for a specific area.
Now the dyes. Any, as long as they are sustainable. The emphasis should be on gray, brown and green colors. Prepare the solution, then immerse either skeins of twine or pieces of fabric at once into it, hold for a while, remove and rinse with cold water until it becomes clean. Then - drying in the sun. At this stage, there is no need to worry if the resulting shade is darker than intended. It's always like that when wet. Wait a day or two for the material to dry.
If the shade is really darker, then it will have to be lightened. To do this, immerse the fabric in a bleach solution (one part bleach to ten parts water), hold it there for a while and dry again.
If everything seems to be fine, start applying “random spots” of dye to give the fabric a natural multi-colored color. The main thing is that everything looks natural.
Step 3: Creating Strands
And now - the most necessary and time-consuming part of the whole work - unraveling the dyed fabric/twine into individual fibers of equal length. The longest ones will go to the sleeves and front, the shorter ones will go to the back.
To begin, cut the fabric into separate pieces with a side of 0.5 to 1.5 meters. It is better to cut so that large seams are cut off. The fabric itself is divided into fibers quite easily, but grouping them by length and shade is more difficult. Next, you can start cutting the resulting fibers to a working length - from 20 to 35 cm. You don’t need to go any longer - it won’t look too natural.
Step 4: Tying the Strands
There is a mesh that fits tightly onto the basic clothing, and there are multi-colored fibers. Now you can start tying the strands. Take a handful of fibers (3-4 of the same color are required) and tie them to a network node. In this case, it is necessary that there is no one dominant color anywhere - the shades should be distributed more or less evenly. This is easier to do if you initially arrange all the fibers into separate piles by color, and then distribute them evenly, trying to avoid repeating combinations.
What else will you need for the costume?
You will also have to purchase:
- Paint. When choosing, you must look at what fabric it is intended for. It is necessary to focus your attention on those that can dye both synthetics and cotton fabrics. The appropriate color is selected by trial and error. It is recommended to consider several shades of green, black, olive, yellow, and soft brown.
- To sew individual parts of a camouflage suit, you need to use about one hundred meters of ordinary white nylon thread. Its thickness should be about one millimeter.
- You will also need about 25 meters of nylon cord 3-5 mm thick. It is necessary to strengthen (reinforce) the suit at the edges.
It’s quite simple (albeit time consuming) to make a “Goblin” costume for hunting. Anyone with patience and perseverance can create it with their own hands.
Main menu
Share the news with your friends
The Gilly camouflage suit (aka “Leshy”) is a good thing, indispensable in the household, especially for a sniper. The manufacture of such a camouflage suit itself is not particularly difficult. Therefore, any fighter can easily save on buying a Gilly by making a shaggy camouflage suit on his own. Moreover, ideally it is necessary to have several options: for the conditions of “summer”, “autumn” and “winter” - at a minimum, and at a maximum - different variations for different types of terrain.”
As for the elements of the Ghillie costume, it is recommended to have three components:
- Complete camouflage set (jacket with pants);
- Cape-poncho;
- Jacket-hoodie.
The easiest cape to make is the poncho, which is both comfortable and versatile. The most difficult option to make is a complete set consisting of a jacket and pants. Everyone is free to choose a disguise to their liking. However, both the production of a complete set and the production of an incomplete set have common points.
1) We start with the dummy net. The more you have, the better, since part of the mesh will have to be spent on experimentation to identify the best color for camouflage. Usually, a cut of 3-4 meters and a width of one and a half meters is sufficient for making a suit and preliminary color selection. The initial color of the mesh is not particularly important, but the cell size should be limited to the range of 1-2.5 cm.
2) The second material needed is jute thread. To obtain it, it is best to use brown bags in which potatoes are usually stored. It is not recommended to buy a spool of jute thread as it is much stiffer and thicker than what you will get from a bag. If you also take into account that the thread will become even tougher after dyeing and drying, then it will be very difficult to work with it. Therefore, it is better to buy 5-6 jute bags and unravel them into threads.
3) Finally, paint. When choosing a dye, be sure to look at what fabric it is used for. You should choose ones that can dye both cotton and synthetic fabrics. The selection of colors will be discussed a little below. Color is selected by trial and error. It is recommended to have the following colors:
- several shades of green;
- olive;
- black;
— soft brown (natural colors of clay, sand, etc.);
- yellow.
4) To sew together individual parts of a camouflage suit, you will need about one hundred meters of ordinary white nylon thread about 1 mm thick.
5) In addition, you will need 25 meters of nylon cord with a thickness of 3-5 mm. It will be needed for ties and strengthening (reinforcement) of the suit along the edge.
Preparation of material
Once all materials are available, they need to be prepared for use. The main stages are as follows: the bags are unraveled onto the threads, the mesh is cut out, after which the cut out parts are sewn together. Then comes painting in the selected color. All this should be done carefully, since the sniper’s camouflage depends on how well the clothing is made.
Let's say the sniper has already chosen the camouflage suit option: a jacket-hoodie. It is something between a full set and a poncho.
In order to sew it, you will need the following details:
— Front part (“face”);
— Rear part (“back”);
- Hood;
- Sleeves.
The face and back are cut out the same way.
These are rectangles with a length the height of a person minus 1.5 - 2 the length of the head, and a width of one meter. The length of the part is equal to the distance from the ankle to the shoulder.
From the edges, the parts are sewn to 1/3 of the width, so that there is a hole for the head in the center.
The numbers in the figure indicate:
1 - Face;
2 - Back;
3 - Seam;
4 - Neck.
There should be two sleeves.
These are rectangles measuring 40x70 cm. Since such a camouflage robe will have to be worn on a wide variety of clothes, it is possible that allowances should be made to the maximum. Having cut out the sleeves, they are put aside until they are painted.
The hood is sewn, so one square with a side of 20 cm and 3 rectangles measuring 20x40 cm are cut out for it. Then the parts are sewn together according to the pattern. The finished hood should be of such a size that it almost completely covers a 10-liter bucket.
On the image:
Part 1 has a size of 20x20 cm. Parts 2, 3, 4 are the same, 20x40 cm.
All prepared parts of camouflage clothing are not sewn together yet; this must be done at the very end.
Then you need to prepare the threads. To do this, you should carefully unravel the purchased bags. To do this, the seams in each bag are cut off or unraveled, then the bag begins to unravel along the thread. If you work every day for about five hours, then it takes about five days to dissolve one bag. After the bags are unraveled, you should have 5-6 skeins of jute available, one skein from each bag.
Painting and drying of materials
After cutting the mesh and dissolving the bags into threads, you can begin experimenting with coloring. Here the scope for imagination is unlimited! The main thing to remember is to dye according to the dye instructions, which are printed either on the packaging itself or inside it.
Before you dye everything, take the time to check what color different dyes will give on different types of fabrics. For example, using green synthetic dye on jute threads will give you a beautiful dark olive color. And the synthetic nylon thread will receive exactly the color that was stated on the packaging - green.
Once, as a result of experiments, you have established what you will paint and with what, you can begin the main painting. First, divide the skeins into several groups, according to the number of camouflage colors. For example, if the manufacture of camouflage clothing involves the use of four colors, say, light green, olive, brown and basic dark green, then the available seven skeins should be distributed as follows:
2-3 skeins will be dyed dark green, 2 skeins light green, 1-2 skeins brown and 1 skein olive.
If dark green is chosen as the base color, then not only 2-3 skeins of jute are dyed in this color, but also the parts of the suit cut from the mesh, as well as nylon thread and nylon cord. What needs to be dyed in the base color is divided by type of material (cotton or synthetic), and dyed one by one. Material from the Unfair Advantage community. The painted parts are dried for 1-2 days. At this time, everything else is painted in different colors.
After painting the parts, you should rinse them very well, otherwise even after a little rain your camouflage will fade, turning you and your clothes in various shades of green, brown and olive.
Drying threads should be done in the shade, without direct sunlight. Since natural jute thread has an inexpressive brown-brown color, the same as withered grass, two or three skeins can be left without coloring.
Recommended original colors for Ghillie costume:
Weaving
After all the elements and materials are painted and dried, the stage of weaving the camouflage begins. But before moving on to it, you need to prepare a little. To begin with, a workplace is organized.
You will need:
- A machine to have convenient access to any side of the “web” and providing easy access to consumables
- A comfortable chair, preferably one with a back, so that your back doesn’t get tired
You can use, for example, an old drawing board as a machine, placing it at an angle. We lower the mesh from top to bottom, the part of it that is on the inclined board will be in use, the part that hangs from the back is the free end (read - consumable reserve). You can make the machine simpler, for example, use a laid out ironing board for this purpose. The “shags” prepared for weaving are laid out nearby. “Lokhma” is a prepared bundle of threads of the same length in the amount of 4-5 pieces, folded in half.
Before weaving, preparing the “shags” is a responsible matter. After all, “shags”, in fact, are what actually camouflages us on the ground. There are some subtleties and points that you should pay attention to.
1) The length of the thread for the “shags” is too short, the camouflage looks like a cactus, too long and you will look like a bobtail. In addition, hair that is too long tends to get caught on everything. The required optimum lies in the range of 40 - 55 cm. Folded in half, such a thread will have the required optimal length of 20 - 27 cm. This is enough to “blur the contour” of the area.
2) Weaving method - despite the fact that Ghillie camouflage is woven with the same knot, there are several ways of weaving. Firstly: what is called a “chess square”.
The point here is the following - the bundles are selected in the same color, 3, 4, 5 threads each. The entire surface of the mesh is covered evenly with rags of the same color (initially the base color) according to the principle of a checkerboard (every other) with a step of about 9-10 cm.
Then, in the same order, another color is woven into the remaining spaces, then the whole thing is diversified with a fourth, fifth, etc.
The technology is this: the grid is mentally divided into squares of about 10x10 cm and into their corners, with a step of “every other”, “shags” of one color (in a checkerboard pattern), then another, etc. are woven.
Another way is to do everything in one pass. Its essence is as follows: “shags” are prepared, containing all the colors that form the coloring, then woven into cells according to this pattern.
From the same picture you can see how all this is woven together, regardless of the method.
There is one point - if a fine mesh net (1 x 1 cm) is used as a base, do not try to weave “shags” into each mesh - this is extremely labor-intensive. Choose an acceptable step - about 2-3 cm and follow it.
As in any business, weaving Gilly camouflage has its tricks. Weaving proceeds “from the bottom up” - the bottom row is woven first, the “shags” are directed (combed) down, then the second from the bottom, the shags are also directed downwards, on top of the first row, and so on until the end. The sleeve is woven from the wrist to the shoulder, the hood is from the back of the head to the forehead, the body part is from the legs to the head (the trouser legs are the same), the shoulders are from the neck to the elbow. The result is a pretty decent shaggy look. After several shakes of the finished camouflage (or “take it off and put it on” several times), the shags themselves will lie as they should.
Notes on weaving methods
The first method allows you to weave a ready-made ghillie a little faster. The second method is a little more “correct”, it allows you to achieve uniform coloring over the entire surface of the camouflage, but the first method is more flexible, as it allows you to slightly vary the coloring in the field with just a “light movement of the hand” (more precisely, several movements). Everything is as simple as shelling pears - since in this case the camouflage consists of individual “shags” of different colors, the overall color depends on those “shags” that are on top. By shaking the Gilly several times, shifting part of the “shags” from top to bottom and slightly combing the camouflage, you can get completely different colors that are most suitable for the given area. By selecting primary colors and their selection and combinations, with the first weaving method, you can achieve a fairly large number of colors. With the second method - the greatest uniformity of color and the greatest density of shaggy hair.
Here are the main color options for the original Giles; in the lower left corner there is a list of colors that form the color and the number of threads in the bundle.
Features of weaving individual elements
Sleeves are not sewn together before weaving. The easiest way to weave. Sewn to the “body” from the wrong side after weaving is completed.
After this, the entire workpiece - the body with the sleeves - is folded in half, the sleeves are aligned and this entire structure is sewn together (with dyed nylon thread) - along the sleeves, from the wrist to the body, then along the edges of the body, approximately to the middle of the thigh.
The numbers indicate seams: 1. Seams connecting the face and back of the body 2. Seams connecting the sleeves and body 3. Fastening seams along the sleeves and body
The hood is a difficult element to weave, because after its manufacture it becomes three-dimensional and is difficult to “roll out” into one plane. To braid it with rags, use available means for easy access to the entire surface of this part, for example, a regular, zinc, 10-liter bucket. The overall size of the hood should be just enough to cover the bucket completely.
Before weaving, we pass a dyed nylon cord along the front edge of the hood to more clearly mark the edge and for convenience. Please note that in this case the cord is not a tie. After the hood is woven, we also sew it from the wrong side to the body.
For ease of work, we make a mannequin - from 2 x 2 cm bars, a cross-shaped hanger is assembled with an arm span of 1.5 meters, and a head taller than you. The head is imitated by plywood nailed on top. The entire structure is placed on a cross and properly sanded so that it does not cling to the camouflage.
The body with the sleeves sewn on (but not yet sewn) is draped over the mannequin, aligned more or less evenly, and sewn together as shown in the picture above.
Then the hood is applied, trimmed, centered and sewn to the body in the same way.
Features of sewing - the seam starts along the collar, from the face to the back, to a length of 10-15 cm. Since the length of the “sewn” part of the hood is slightly longer than the neck collar, we run part of the hood to the back, trim it and sew it further. After all these manipulations, we place the mannequin and look around, finding “holes” in the shaggy hair and filling them with “shags” of a suitable color.
Theoretically, the Gilly camouflage is ready. In practice, there are still a lot of things that can be “hanged” on it. Material from the Unfair Advantage community. For example, continue the side seams to the very bottom, make slits in the front and back to the groin, provide the resulting sides with ties and wear the whole thing in the manner of an OZK jumpsuit. You can leave it as is, in both cases Gilli dresses over her head. You can provide the neck of the body with ties and tighten the camouflage around the neck so that it does not fall off, but in this case remember that the ties lift the camouflage up the figure and the boots turn out to be almost completely open.
Based on this technology, it is possible to produce Gilli of almost any configuration. The most practical is a cape-poncho in the style of an army raincoat. Only instead of a tarpaulin there is a net with “shags”.
Making this version of Gilli is as easy as shelling pears. To do this, take a piece of mesh 2x1.5 m, reinforce it along the edge with a nylon cord, reinforce the middle with the same cord, weave rags in, and make loops in the corners from the same cord. The resulting version of camouflage can play the role of both a camouflage net and a camouflage cape, and will serve well when organizing a hunting ambush. You can also make a complete set - trousers + jacket in military style.
Storage and operation - features
It is recommended to store Gilly camouflage flattened on a hanger in the closet. Thus, the shaggy hairs do not cake in a curled state and do not turn into curls.
If you get caught in the rain wearing it, dry it thoroughly. It should be remembered that the Gilly camouflage is not suitable for running through the forest. You need to move in it slowly and carefully. Remember the movie "Sniper" starring Tom Beringer. Remember that we still have a civilian version of military camouflage, intended primarily for sitting in an ambush.
Related publications:
How to survive bombing and artillery shelling?
The battle
A FEW RULES FOR SHOOTING A PISTOL
General information about preparing materials
Before you start making the “Leshy” camouflage suit, you should prepare everything that might be useful. In short, the main steps include unraveling the bags onto the threads and cutting the mesh. Only after this can you start sewing the cut parts together. Next, you need to put on the suit, walk around in it, and perform various movements. If you feel comfortable in the suit, you can start dyeing it in the selected color. All this must be done carefully. After all, camouflage depends on how well the clothes are made.
Detailed description of making the costume
Since we are interested in the Leshy camouflage suit for hunting, and not full-fledged sniper equipment, we will consider the option of making a hoodie jacket. This is something between a full set and a poncho cape. To create a jacket you need the following components:
- Front part.
- The back of the product.
- Hood.
- Sleeves.
The cutting of the front and back is done in the same way. Parts are cut out in the form of rectangles, which should have a width of one meter and a length equal to a person’s height, measured from ankle to shoulder. Their width is one meter. The edges at the top need to be sewn by one third to leave a hole for the head. Sleeves must be made in two pieces. In this case, rectangles with dimensions of 40x70 centimeters are used. When making a “Leshy” suit for hunting with your own hands, you must take into account that the camouflage robe will have to be worn over various clothes, possibly over a padded jacket. Therefore, allowances should be made of at least 5 cm. When the sleeves are cut, they must be put aside until painting. All that remains is to make the hood. To do this, you need to cut out one square with sides of 20 cm, as well as three rectangles with dimensions of 20x40 centimeters. They are then sewn into a hood. The finished element should almost completely cover a ten-liter bucket.
Cutting out a ghillie suit
This model of camouflage suit consists of two parts, upper and lower, connected to each other along the waist line, i.e. overalls.
Fold the fabric in half along the edge, with the right sides inward (excluding the direction of the pattern, the grain thread, etc.) Place the details of the pattern of the front, back, sleeves on the fabric along the warp or pattern thread (align the center of the front with the sections of the fabric, the center of the back with the fold, the sleeve is located lower in the free area)
Then lay out the pattern of the trouser parts; if the fabric does not have a clearly defined direction of the pattern, then the parts can be located in different directions.
When cutting a camouflage suit, try to lay out the pattern details as rationally as possible. Avoid too large distances between parts so that there are no small drops (pieces of fabric) that will later go into the trash. If you rationally lay out the patterns, you will eliminate the formation of unnecessary attacks, and from the saved space you can cut out finishing details (pockets, flaps, facings) or more.
Reveal the base of the top
When cutting the front, back, sleeves and trousers, add 3.0 - 5.0 cm in length. You will find out why this is needed further.
Apply allowances of 1.5 - 2.0 cm along the shoulders, sides, center of the front and bottom, in addition to the above values, add 3.0 cm along the bottom of the front and back for freedom of movement. Neck allowance 1.0 cm, sleeve bottom allowance 1.0 cm + (3.0 – 4.0 cm) for freedom of movement.
On the trousers, apply an allowance of 1.5 - 2.0 cm along the side, step, middle seam and top seam. At the bottom of the trousers, allow a hem allowance of 4.0 cm. In addition, add 5.0 cm along the top seam (for the women's version ) and 10.0 cm (for men). What is it for?
In the finished version, the suit is a jumpsuit, so when squatting or bending, a margin of freedom of movement is required. If this is not done, tension will appear, which will lead to discomfort in the front of the neck and in the lower part of the body.
Cutting the trousers
The width of the product should also be increased for a loose fit, as in sportswear. Since this suit is intended for active recreation, it is necessary to take into account its freedom in relation to the body. But I didn’t bother with these and took patterns 1-2 sizes larger than my size. The only thing I had to adjust was the side seams on the front and back so that they matched the side seams on the pants.
Open the hood
As a pattern for the hood on the stand, I used the hood of my favorite sweater, which also had to be adjusted to the neck after fitting, since it went deeper. Thanks to this, I now have a hood pattern on the stand. Allowances on the hood on the lower and outer edges are 1.0 cm, on the middle 1.5 cm.
Cutting out overalls
After checking all the allowances, width, length, location of parts, you can proceed to cutting out the parts.
If you don’t have ready-made patterns, don’t worry. You can quickly and easily make a pattern without complex construction and calculations, watch my video tutorial on sewing a Jack Sparrow costume
Coloring of materials
Once the mesh is cut and the bags are unraveled, you can start experimenting with coloring. There is a wide scope for imagination here. But you need to remember that you need to paint strictly according to the instructions. Before starting the process, you need to check what colors the purchased paints give on different fabrics. For example, if you use a green synthetic dye on jute threads, you can get a dark olive color as a result. However, for nylon thread it will correspond to what is stated on the packaging.
Once you have decided on the colors, you can begin the main painting. Initially, it is necessary to divide the skeins into several groups. Each of them will correspond to a specific camouflage color. Please note that they may be shaded. For example, using dark green and clay in equal proportions will make the costume appear more brown to people. You also need to decide on the basic coloring. It should be applied not only to the largest number of skeins, but also to parts cut from mesh, to nylon thread and to cord.
Materials for creating the Kikimora camouflage suit
So, when thinking about how to make a Kikimora camouflage coat with your own hands, you need to determine what material the suit will be made of. You can take a fishing net measuring 1.5 by 3-4 meters. The cell size in this case should be 1-2.5 cm. The color of the mesh used does not matter, because the camouflage will be “laid” on top of it.
Next you will need jute thread, which is used in ordinary bags. You can purchase a spool of such thread, but it is advisable to use 6-7 bags. Experts in this area advise choosing the second option, since the thread from the bag is softer, more elastic, and thinner.
The third thing you need is dyes. Their selection is a very responsible matter. The dye must be chosen so that it is suitable for cotton and synthetic fabrics. There should be several colors and shades: 2-3 shades of green, black, brown, olive, yellow.
You will also need a nylon thread 100 meters long and 1 mm thick. You need to purchase one skein. The color should be within white, brown or black shades. This thread is necessary for joining parts. You also can’t do without a nylon cord 25 meters long and 3-4 mm thick. It is necessary to strengthen the edges of clothes and create ties.
Drying
After dyeing, the stage of preparation for using the costume begins. The first step is to dry it thoroughly. Before doing this, all parts must be rinsed well. Otherwise, even a little rain will cause the camouflage to fade.
Your clothing should include a variety of shades of olive, brown and green. You need to dry your suit in the shade. Avoid exposure to direct sunlight. Since natural jute thread has an inexpressive brown-brown color, similar to withered grass, one or two skeins can be left undyed. There is very little left to complete the sewing of the homemade Leshy costume for hunting.
Weaving camouflage
When all the parts and materials are ready, you can proceed to the final stage - weaving. This is not an easy task, so you first need to prepare the workplace. To do this you will need a machine and a comfortable chair. For the first one, you can use an old drawing board. Install it at an angle and place the net on top. Let the second part hang down.
We lay out the mesh parts and move on to making the so-called shags. They will be a bundle of 4-5 threads of the same length. In this case, they should be folded in half. Since it is the shags that will camouflage the wearer of the camouflage, their production should be approached with special attention. In this case, the following points should be taken into account: the length of the threads should not be too short, nor too long. In the first case, the person will look like a cactus. In the second, they will cling to everything.
Practice has shown that the optimal length of threads is 40-55 centimeters. If you fold them in half, the bun will be in the range of 20-27 cm. Such shaggy hairs will allow you to well blur the outlines of the body on the ground. When making a “Goblin” costume for hunting with your own hands, it is necessary to use one color for better quality, placing it in a square with sides of 9-10 centimeters. Then another square should go with a slight offset. Other approaches can be used, but this one is recognized and popular.
Weaving
After all the elements and materials are painted and dried, the stage of weaving the camouflage begins.
But before moving on to weaving itself, you need to prepare a little. To begin with, a workplace is organized.
To organize a comfortable workplace you will need two things:
— a machine to have convenient access to any side of the “web” and providing easy access to consumables
— a comfortable chair, preferably with a back, so that your back doesn’t get tired.
As a machine, you can use, for example, an old drawing board or a wide ironing board, positioning it at an angle.
The mesh is lowered from top to bottom, the part of the mesh that is on the inclined board will be in use, the same part that hangs from the back is the free end (consumable reserve). The so-called shags prepared for weaving are laid out nearby.
Lokhma is a prepared bundle of threads of the same length in the amount of 4-5 pieces, folded in half. Preparing shags is a responsible matter. After all, shags, essentially speaking, are what actually camouflages a sniper on the ground. There are some subtleties and points that you should pay attention to.
The first important parameter is the length of the thread for the shags. If the threads are too short, the camouflage will look like a cactus; if the threads are too long, it will look like a long-haired dog such as a lapdog or bobtail.
In addition, too long shags have one very unpleasant and dangerous feature - they cling to everything. The required optimum is 40–55 cm. Such a thread, folded in half, will have the required optimal length of 20–27 cm - this is enough for a high-quality “contour blur” on the ground.
The second important parameter is the weaving method. Despite the fact that Ghillie camouflage is woven with the same knot, there are several ways to weave it.
Firstly, this is weaving under the code name “chess cage”. The essence of this weaving method is as follows: bundles of threads are selected of the same color, 3, 4, 5 threads each. The entire surface of the mesh is evenly covered with rags of the same color (first the base one) according to the principle of a checkerboard (every other) with a step of about 9-10 cm. Then in the same order another color is woven into the remaining spaces, then the whole thing is diversified with the fourth, fifth and etc. The technology is this: the grid is mentally divided into squares of about 10x10 cm and into their corners, with a step of “every other”, “shags” of one color (in a checkerboard pattern), then another, etc. are woven.
Checkerboard weaving option
Another weaving method is conventionally called “all in one pass.” Its essence is as follows: “shags” are prepared, containing all the colors that form the coloring, then woven into cells according to this pattern. The figure shows how all this is woven together, regardless of the method.
Weaving method "all in one pass"
There is one important point: if a 1x1 cm fine mesh net is used as a base, do not try to weave rags into each cell - this is extremely labor-intensive. Choose an acceptable step of about 2-3 cm and follow it. As with anything else, weaving Ghillie camo has its tricks. Weaving proceeds “from the bottom up”: the bottom row is woven first, the tufts are directed (combed) down, then the second from the bottom, the tufts are also directed downwards, on top of the first row, and so on until the end.
The sleeve is woven from the wrist to the shoulder, the hood is from the back of the head to the forehead, the body part is from the legs to the head (the trouser legs are the same), the shoulders are from the neck to the elbow. As a result of this weaving, a fairly decent “shaggy” effect is obtained. After several shakes of the finished camouflage (or “take it off and put it on” several times), the shags themselves will lie as they should.
Special notes on weaving methods
The first method, the “checkerboard” method, allows you to weave a finished camouflage suit faster. But the second method is a little more “correct”, since it allows you to achieve uniform coloring over the entire surface of the camouflage, but the first method is more flexible, since it allows you to slightly vary the coloring in the field with just a few hand movements.
Everything is as simple as that - since in this case the camouflage consists of individual tufts of different colors, the overall color depends on those tufts that are on top. By shaking the Gilly several times, moving some of the rags from top to bottom and slightly combing the camouflage, you can get completely different colors that are most suitable for the given area.
By selecting primary colors and their selection and combinations, with the first weaving method, you can achieve a fairly large number of colors. With the second method - the greatest uniformity of color and the greatest density of shaggy hair. This is the dilemma. Which weaving method to choose is up to you to decide.
The photo below shows the main color options for the original Ghillie suits; in the lower left corner is a list of colors that determine the color and number of threads in the bundle.
| Camouflage camouflage Ghillie / Gilly colors Desert (Desert, Desert) | Camouflage camouflage Ghillie / Ghillie colors Mossy (Moss, Mossy) |
| Camouflage camouflage Ghillie / Gilly colors Woodland (Forest, Forest) | Camouflage camouflage Ghillie / Ghillie colors Leafy Green (Green leaves) |
A few words about storage and operation
We looked at how to make a “Leshy” costume. Hunting for living creatures in it should be successful. The created camouflage should be stored in a closet, hanging it on hangers, carefully straightening and smoothing out the created tufts. If you store it correctly, they will not turn into curls, curl or cake. If the Goblin suit for goose hunting gets wet due to moving through the swamp, then it should be dried thoroughly.
An important point is that camouflage is needed to set up ambushes, and not to run through the forest in it. If you have to move around in it, you should do so slowly and carefully so as not to damage it. If for any reason (lack of time, experience, material) it is impossible to make a costume, then you should consider purchasing it in a store. That's all you need to know about the Leshy costume. The photos in the article give you a good idea of what the end result should be.
LiveInternetLiveInternet
Ghillie suit, Ghillie costume, Goblin, DIY Kikimora
Having set myself the goal of making a sniper suit myself, I tried to find a detailed description of how to make it on the Internet, but I didn’t find one that suited me 100%, although many of the tips were very useful.
In this article I outline my own experience in making a camouflage suit. My wife provided invaluable assistance in this difficult undertaking, for which she has great respect and gratitude. In this case, the suit was intended for playing laser tag, but perhaps this experience will also be useful for fans of other paramilitary games - airsoft, paintball, hardball. As a base, I took a cheap camouflage suit with a zipper. For the scraps, I bought three types of camouflage fabric that differed in tone and pattern. By the way, you should carefully choose the color of the base suit, since not all details are covered with camouflage elements. In addition, I used hemp cord.
The first thing we did was alter the hood, as advised in one of the articles I found (see picture):
This significantly changed the outline, masking the recognizable silhouette of the head and shoulders. Next we started sewing the flaps.
The flaps were strips of fabric with long straight sides, parallel or converging like a trapezoid, and two cut off deliberately unevenly:
The width of the flaps was 10-30 cm, length - 30-60 cm. The seams were oriented so that when a person in a suit was in an upright position with his arms down, they were parallel to the ground (Fig. 3) The most careful consideration should be given to the camouflage of the hood , shoulders, back, forearms will be partially covered by flaps hanging from the shoulders, the chest will almost always be covered by the arms, the legs will be covered by grass, bushes, in addition, the flaps on the legs will often cling to bushes and grass when moving.
We sew the flaps as shown in the figure:
After all the flaps were sewn, I cut them into thin strips of 1-4cm:
Trying to cut smoothly is completely unnecessary; the more chaotic it turns out, the less the costume will attract attention. After this operation, the costume was almost ready, but subsequently, I strengthened the camouflage by additionally sewing on bundles of hemp twine.
The results of the field test can be seen in the photo:
(Editor's note: The photo shows the worst results of camouflage. We couldn't see the best laser tag players).
And some tips:
- There is no universal suit, carefully study the area in which you will play and, based on the environment, choose colors.
- You can always improve the costume on the spot by adding elements of the surrounding vegetation.
- The suit leaves the face and hands exposed; to camouflage them, gloves and a balaclava that match the color are suitable; to camouflage the face, in addition, you can sew something like a veil made of camouflage or khaki mesh. Weapons also need camouflage.
- You should not evenly distribute rags of different colors; in most cases it will be better if different colors and tones prevail in different places.
- Since the suit assumes a sedentary style of play, it is worth thinking about insulating it in places that come into contact with the ground when in ambush. I solved this issue by sewing pieces of a tourist polyurethane rug from the inside.
- And finally, making such a costume is a creative process; you should not be afraid of experiments.
So in the spring I decided to take up airsoft and become a stalker, so after searching the Internet I found this article, no, this does not mean that I will do as in the article, I, like the author of the article, found a bunch of stories on how to do it, so I will do as usual and take it as a basis the most convenient basis and will add to the creation plan the most interesting and useful thoughts from different authors, but the article is good.