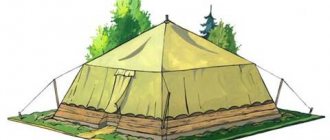
Often, active recreation lasts for more than one day, and then it is especially important to know how to act so that the night is no less comfortable than the daytime. One of the life-saving devices that allows you to cook food, illuminate a resting place, or simply keep warm is the Finnish candle, invented by a citizen of Finland at the beginning of the twentieth century.
Creating a candle with an ax
You need to choose a log without knots with even grain. It is split into 6-8 logs with an ax. The wedge of their center is split in such a way that when reassembled, the log takes the shape of a tube.
After preparation, the chopped firewood is collected back into the log. It is tied at the bottom with steel wire, which will hold it in place and prevent it from falling apart. If you do not use it, the candle will burn less.
To light a candle, you need to cut the split ends of the log into chips, and then place them in the log pipe. One chip is set on fire with a match and lowered to the kindling. As soon as intense combustion begins, you need to add a little more fine fuel on top. This must be repeated until the log itself begins to burn.
Assembly of thin logs
This option is suitable if you don’t have a tool. In this case, three to five logs are placed on their ends and tied in a vertical position.
Such a stove is easier to manufacture and ignites much easier, which is important if you have insufficient experience. The first three options require a log with a diameter of 20 to 30 centimeters
Large diameters are not advisable. The height should be approximately twice the diameter. With this ratio of diameter and height, your hearth will be the most stable
The first three options require a log with a diameter of 20 to 30 centimeters. Large diameters are not advisable. The height should be approximately twice the diameter. With this ratio of diameter and height, your hearth will be the most stable.
Now let’s take a closer look at perhaps the most important issue. How to light a fire, which is described above
Even for experienced tourists, this problem will arise during their first attempts. How can you make a Finnish candle burn faster? Yes, very simple. It is enough to remember the elementary laws of nature:
- the flame burns only if there is a sufficient supply of oxygen;
- heated air always tends upward.
Therefore, for successful combustion it is necessary to ensure that these two conditions are met. Namely, there must be at least a small gap between the parts of the chopped wood so that the flame moves freely upward, and there must be a free flow of air from below. This can be achieved in the following ways:
- slightly cut off the central parts of the chopped logs with a knife or an ax;
- using available means (for example, stones or a pair of thin sticks) raise the fire above the ground;
- chop off the lower parts of at least two adjacent parts so that a small channel for air flow is formed into the center of the fire.
The second option is not very successful, since a fire lit in this way will not be stable enough.
Cooking
For cooking food on a mini-fire, cookware that can easily withstand high temperatures is suitable. But if you place it directly on a log, the fire will immediately stop burning. After all, the fire certainly needs to have a way out. This problem can be solved like this:
- Make a stand from 2 raw sticks or stones. Their thickness should not exceed 5 cm.
- When preparing the structure, two (three) parts of the Swedish candle need to be placed a little higher (at the same distance).
In the latter case, the desired location can be achieved using different methods. If a taiga candle is assembled from thin logs, then when cut, one pair becomes slightly longer than the others. In a vertical position, it will provide the necessary gap between the surface of the wood and the dishes. Also, already during assembly, it is possible to move two logs out a little relative to the rest.
It is permissible to do the same with split logs. Then 2 channels of the lower air supply are simultaneously formed. This way the fire will burn better and much more stable.
Pan liners
Making a Finnish candle for cooking
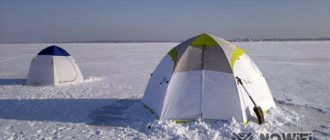
Fans of outdoor activities, as well as hunters and fishermen, know how important it is to properly build a fire in order not only to keep warm, but also to cook camp food on it. This is especially important in winter or in slush, when you constantly need to add firewood and make sure that the fire does not go out
A Finnish candle, whose other names are taiga, Swedish, and Indian, can provide warmth and light for a long time, as well as ensure fire safety in nature. This fire design is easy to move without fear of burns, and it can burn all night.
How to make a Finnish candle will be described in detail below.
Features of the Finnish candle
An effective candle for burning is a log with a diameter of 12 cm and a height of more than 18 cm. When building a fire, the type of wood used does not matter, but it is better not to use coniferous wood due to the release of resin, which sparks and cracks.
In other cases, the main thing is that the wood used is dry, but not rotten.
The proportions of a Finnish candle depend on its purpose: for heating it is more convenient to use a thick and long log, for lighting it is more convenient to use a long and thin log for ease of carrying, and for cooking the candle should be thick and short.
Finnish candle: how to make
The simplest method is the so-called camping method, or making a Finnish candle from a ready-made log, if one is found in the forest. You need to select three cuts of the same size and place them in a circle close to each other. Light a fire in the middle.
Uniform burning in all directions will be ensured by the correct choice of logs in height, which should be twice the diameter of the logs in width. If you place a three-liter pot on these logs, it will boil in less than half an hour.
As the logs burn out, they will need to be placed in a “hut”, and then simply add firewood.
If it is possible to use a chainsaw, a Finnish candle can be made with your own hands as follows: take a thick log at least 50 cm long and cut it crosswise in the middle to about three-quarters of its height. If the log is too wide, you can make cuts so that the log is divided into eight “slices”. If you make more of them, then the Finnish candle will burn out faster. The log needs to be well secured to the ground, supported by stones or slightly dug into an earthen depression. Sawdust, dry fuel or a mixture for ignition are placed inside the cuts.
If you don’t have a chainsaw, you can make a Finnish candle using an axe. The log splits like a regular wood splitter, only into identical logs. Then they are gathered together and tied at the bottom with wire.
A thick branch is inserted into the middle of the hearth, which serves as a kind of wick for a Finnish candle. If the log is not too large, a branch can be stuck into the ground, then it will act as a leg for the fire.
If there is no tool nearby, you can assemble a Finnish candle with your own hands. Thick poles with a diameter of at least 5 cm are collected and installed around the branch in the same way as the method described above. On the inside of the poles, located in the center, you need to make nicks with a knife so that they ignite faster.
How to make a Finnish Primus candle with your own hands for cooking
The Finnish Primus candle is used only for cooking, since its heat is not enough to heat it. Its difference from a regular Finnish candle is as follows:
- The log should have a notch inside if it is whole. If the fire is assembled from individual logs, they can be planed in the middle, then connected as described earlier, secured with rope or wire so that they fit tightly to each other, forming an outer side without gaps.
- The logs located opposite each other are trimmed or pushed up a little more than the others by 5-6 cm. Made in this way, they form a structure that allows the fire to be fanned by air, while the flame will be directed predominantly upward.
Thus, the fire is concentrated inside the structure, releasing heat for faster cooking. For cooking, it is better to chop the log into four parts, not eight.
If possible, it is better to place the fire on stones or logs so that there is a gap for air below. Otherwise, you can cut a small air duct from the bottom of the logs.
In addition to heating and cooking, such a fire is often used as a beacon on the shore.
- source
- A selection of videos on the topic:
Security measures
Like any other sources of fire, a Finnish candle requires accuracy, vigilance, and compliance with the following safety rules:
- The fire pit should be located away from dry trees. And it is better to thoroughly clear the clearing itself of grass, leaves, and pine cones in order to prevent the possible spread of fire.
- Despite the fact that this design is relatively safe, it (if possible) should not be lit on peat bogs.
- Containers with lighter fluid must be kept at a safe distance from the fireplace.
When constructing a Finnish candle, it is imperative to follow safety precautions, use protective gloves and goggles.
Making a Finnish candle on your own is not that difficult. To do this, you need to familiarize yourself with the features of such a mini-bonfire, strictly follow the construction technology in practice, and listen to useful recommendations. Then a long rest in nature will be comfortable: with hot food, constant warmth, dry clothes even in case of bad weather.
How to light a fire
Before making a primus from a log, prepare a saw, wire and log.
Find a dry log with a diameter of 10 - 40 cm without knots. The tree can be anything, just keep in mind that each type has its own characteristics. For example, spruce and pine sparkle when burned, so it is better not to use them for heating. You need to be careful with birch, because it burns very strongly, you can get burned, and it smokes a little due to the tar in the bark. The best option is well-dried aspen. When burning, its flame is even and colorless.
Trim the log depending on its purpose (15 - 40 cm). If you will be lighting a fire for cooking, use a log that is thick and short so that you can place the dishes directly on it. The candle will be stable. For lighting, on the contrary, a long and thin candle that can be carried if necessary will be convenient. And for heating you need a thick and long one to burn for a long time.
Split a dry log into four pieces. These will later be used to make a fire.
In each part, remove the middle so that when assembling the log you get a hole with a diameter of 5 - 7 cm, and make small notches. Ideal if you find a hollow tree. After cutting or splitting, you will need to scrape out the rotten middle of the hollow.
Fold 4 logs into a single log, wrapping them with wire, trying to leave as few gaps as possible. This will prevent them from falling apart and quickly burning through large gaps.
This way you should end up with a solid log with an empty middle.
Place the sawdust that remains after cutting off the middle or birch bark into the resulting ignition hole. The filling of a wooden kerosene stove and its location affects the degree of combustion. Located at the top of the hole, birch bark will burn for a long time, only weakly. This candle is more suitable for warming up food or for heating. Well, if you put the birch bark on the bottom, the fire will be very strong, which is good for cooking or lighting, but the candle will not last long. The best option is to find it in the middle. Also make sure that there is draft for combustion. To do this, place the candle on stones or logs.
Now you can use the fire, which will be very convenient for cooking. Convenience lies in the ability to adjust the strength of the flame by blocking the access of air from below with a lid, earth, etc.
Food will cook in hot smoke because the fire will smolder from the inside rather than burn.
Also, blocking the air (bottom and top) serves to extinguish the candle if it is no longer needed, and then reuse it if necessary. Basically, a candle is enough for several meal preparations.
We hope these tips on how to start a fire help you.
Finnish candle at work
Finnish candle is the most common name for several fires of similar design, built inside a specially prepared log or between several combined logs standing vertically.
The design of the Finnish candle allows you to light a full-fledged fire with the least amount of fuel, in some cases making do with only one log. In addition, such candles tolerate windy weather well, and some of them tolerate precipitation when using dishes that cover the combustion area.
All versions of the Finnish candle are intended for cooking and lighting the area, and some of them are also used for heating and drying things.
This type of fire is economical, compact, easy to transport, its structure can be built in advance, compared to many other types of fires, it leaves only a small fire on the ground, and in some cases does not leave it at all.
Having been invented in the 30s of the last century by a citizen of Finland, the Finnish candle became widely known among hunters, tourists and other outdoor enthusiasts and is actively used to this day.
Its popularity is evidenced by the many names given to this fire. Among them: a fire candle, a forest candle, a hunting candle, an Indian candle, an Indian torch, a Swedish candle, Swedish fire, a Scandinavian candle, a taiga candle, a Canadian candle, a Roman candle, a wooden kerosene stove, a wood-burning primus stove, an ox, a vertical fire made of logs.
Advantages and disadvantages
Like any other fire, a Finnish candle has its advantages and disadvantages. And, since each mini-bonfire is somewhat different from each other, we will focus on the main ones inherent in most of them. So, the popularity of the design is due to its:
- economical (you can make a Finnish candle from one small log);
- compactness (the preparation for the fire can be stored outdoors under an awning, and can also be easily and conveniently transported in a car);
- safety (some varieties are so safe that they involve the use of fire on peat bogs);
- mobility (without much effort you can carry a Swedish candle, even while burning);
- duration of combustion;
- ease of erection and ignition (even a novice naturalist can cope with this task);
- the possibility of using a wood stove in the form of a stand for dishes (due to the even cut of the log);
- environmental friendliness (some varieties do not leave marks on the ground);
- resistance to adverse weather conditions (bonfires are not afraid of wind and drizzling rain; if you cover the burning center with dishes, the candle will not go out even with larger precipitation);
- the possibility of “preserving” the hearth (some types can be re-ignited after storage in a place protected from precipitation. Moreover, for re-ignition, one spark obtained using flint or the rays of the sun is enough).
The disadvantages of a mini-bonfire include:
- almost impossible construction if you don’t have a saw or an ax at hand;
- the need for a certain type of wood and thickness, which is problematic to find in the tundra, field or steppe;
- during cold weather it heats very weakly, and then only at close range;
- It is impossible to cook several dishes at the same time, because the work surface is only enough for one pot.
Interesting fact! Few people know that the technology for making the Finnish candle was known long before its promulgation in the 30s of the last century. The true inventors of the mini-bonfire were the ancient North American Indian tribes, persecuted by the British, and therefore forced to lead a nomadic lifestyle.
What can a Finnish candle be useful for?
In addition to cooking and heating (except for the Primus stove), such a fire is simply irreplaceable as a beacon. Experienced fishermen who go out at dawn leave it on the shore as a signal for those who are late - in the dark it can be seen from afar.
It is very convenient when using Finnish candles that almost until they burn out completely, they can be moved from place to place without difficulty and without causing burns. The long-lasting nature of the fire can be considered a significant advantage: a medium-sized log provides light and heat for about four hours. And a maxi-fire without additional fuel can perform its functions all night long.
If you are not a fan of “wild” tourism and fishing, but like to celebrate the New Year at the dacha, Finnish candles placed along the paths will bring romance and decorate the garden no worse than garlands and Chinese lanterns.
The original mini-bonfire is also called a taiga, Indian, or Swedish candle. Thanks to the peculiarities of making Finnish candles and the use of intense flame, they successfully replace traditional fires on hikes, at picnics and evening gatherings in the yard. You need a minimum of tools and skills, 5-20 minutes of simple effort, and you will get a source of vertical flame with a burning duration of half an hour to 7 hours.
Finnish candle options
Before you make a Finnish candle with your own hands, you need to familiarize yourself with all the features of the technological process. The fact is that since the invention of the mini-bonfire, resourceful naturalists have worked hard to expand its varieties.
Any wood is suitable for making, but in no case raw wood. Moreover, the most suitable material is aspen, which ensures long-term burning of the primus stove. If you have a choice, it is better to refrain from using pine - they spark strongly when burning, as well as birch, which smokes profusely.
Classic version
Many people are interested: if possible, how to make a Finnish candle on a hike without having a tool at hand? To create a classic Finnish candle, you do not need an ax or chainsaw, because the design does not require cutting.
Log for a “Finnish candle” with three cuts.
It is enough to find the most dry, hollow inside stump with a diameter of up to 30 cm and uproot it. Then you need to pour dry grass, brushwood or paper into the middle of the stump and pour gasoline or special lighter fluid into it. Such a fire burns for a long time and dries the damp clothes laid out around it in record time.
With two holes
This type of Finnish candle is quite simple to make. In a log or uprooted hollow stump you need to make a deep vertical hole and a horizontal one located perpendicular to it. As a result, after they touch, you should get the letter “L”.
"Finnish candle" with two holes.
Then the hole should be filled with brushwood and set on fire. You need to arm yourself with patience, because this version of a mini-bonfire is set on fire both from below and from above, and ignites slowly.
Three logs nearby
Logs placed side by side and connected to each other not only burn longer than one, but also allow you to cook several dishes at the same time. Before building such a fire, the logs need to be prepared: remove the bark from parts that will come into contact with each other, make deep cuts to break the integrity of the wood. Then fold the pieces horizontally, cover the areas cleared of bark with brushwood and set them on fire.
“Finnish candle” made of three logs.
After the wood chars and smokes, install the logs vertically, close to each other. Place brushwood and dry grass inside each one again. As soon as a stable flame appears from the logs, the Finnish candle is ready.
Wired
This option is no less popular than those described above. The log does not need to be sawn, just split it into several parts and then fasten it back together with wire. Fill everything you need for ignition inside and set it on fire. The main requirement is the same height, because otherwise, the possibility of cooking is excluded.
“Finnish candle” fastened with wire.
With longitudinal cuts
To make the most reliable Finnish candle, beloved by seasoned naturalists, you will need a chainsaw. First, smooth, vertical cuts are made, reaching 2/3 of the log (the cuts are needed so that the fire receives uniform portions of oxygen and does not go out). Then it is ignited using a special liquid. It ignites slowly, but smolders for a very long time.
Many people appreciated this design during the winter cold, when other types of mini-fires are ineffective. A Finnish candle with longitudinal cuts ensures a stably burning fire in any weather. However, the necessary tool is not always at hand. Therefore, when going on a winter hunt, it is better to take with you a structure with 4-6 cuts already prepared.
A log split into four pieces
Even if there is complete limitation and lack of material, a log split into four parts will save the situation. To create a fireplace, an ordinary ax and basic splitting skills are enough. A log split into 4 parts lights up almost instantly.
However, before you start igniting, you need to make cuts in the places where the wood will come into contact. Using this design, you can dry wet clothes and prepare lunch at the same time. But you shouldn’t rely on long-term burning, since the torch disintegrates after the logs burn out.
Purpose of the fire
The unique design of the Finnish candle allows you to build a real fire using a minimum amount of fuel, sometimes one log is enough for this. In addition, such a fireplace is not afraid of precipitation (if the combustion center is covered) or strong wind.
Fields of application while hiking:
- Lighting. A smoldering fire will light up the place where you spend the night and will not go out in case of sudden rain or gust of wind.
- Heating. In cold weather, it quickly heats up and guarantees constant safe warmth and comfort.
- Orientation. When going on a distant walk, you can easily determine your location using a taiga fire and easily find your way back.
Interesting fact. A log fire, in contrast to the classic one, leaves almost no traces, and therefore does not harm the environment.
For culinary purposes
In a natural environment, using a Swedish candle it is possible to:
- cook hot food in a cauldron;
- to boil water;
- reheat prepared food;
- process the game carcass.
It is worth noting that such a “log stove” is equally functional under any circumstances, including in windy areas.
Cooking over a fire
For landscape decoration
Often, fans of wildlife use taiga candles for decorative and practical purposes. After all, such a fire, burning in the dark, creates a special atmosphere of comfort, which cannot be achieved by any artificial light sources. In addition, a Finnish candle placed in the recreation area will decorate the holiday and create a romantic mood.
For repair and construction use
Since such a fire is extremely simple to set up, it is easy to transport, and the logs can be prepared in advance, many specialists use it to quickly complete individual jobs:
- heating bitumen, roofing felt;
- firing, heating of metal;
- drying various surfaces.
Important! The Swedish candle provides a safer burn than traditional fires. Perhaps that is why this type of fire has gained immense popularity among lovers of outdoor activities in natural conditions.
More options for the Finnish candle
In addition to the main one, there are at least two more options for the Finnish candle. They also have all the properties and characteristics of a regular "candle", except that they do not have the ease of carrying a fire.
One option assumes that you do not have a saw, but have an axe. Which you take and chop your log into four, six or eight pieces just like in the original fire. Then use an ax to grind down the middle a little and connect all the parts together. Now you need wire, rope or something to tie these parts of the log together. That's it, the Finnish candle is ready. Place kindling inside and light a fire.
The next option is the simplest of all. We take small logs (logs) with a thickness of approximately 5 to 15 centimeters. The thickness depends on your tasks: heating, lighting or cooking. You need from 3 to 8 such logs. We tie them together (you can sharpen them and drive them into the ground), after which a hole for kindling is formed in the middle. Let's light and enjoy a beautiful and light fire. True, it will no longer be possible to transfer it.
Finnish candle - configuration 3
This configuration requires the most materials to create, but it also has the highest efficiency and run time in my experience.
For the third configuration of the Finnish candle, you will need as many as three logs of approximately the same length. Fortunately, it is almost always possible to cut them from one tree trunk. The length and diameter of the logs are selected based on the desired operating time and the duration of cooking of certain dishes.
Try to choose a log without bark, or additionally debark it before proceeding. Bark is a tree’s natural protection from many negative factors, including fire, so logs with bark, due to their increased density, flare up much worse. On the outside of three of the six halves of the logs you will need to make notches that are already familiar to you from the previous configuration. They, as in the previous case, will act as kindling and help spread the flame over a large area inside the future Finnish candle.
After the notches are made, place the halves with them in the shape of a triangle, with the notches inward. Remember also that the flame inside the Finnish candle should go against the “wool” formed by the notches. With the remaining three halves, prop up the notched halves as shown in the photo above.
Next, the channel inside the three halves should be filled with tinder and kindling and ignited. Until the moment when the logs themselves ignite, you will get some kind of semblance inside the logs, therefore in the early stages you will observe mainly a large amount of smoke coming out of the bowels of the Finnish candle.
But as the temperature rises and the coal base accumulates, the logs themselves will light up, and your Finnish candle will go into its operating mode, accompanied by a high flame. This design resembles an eternal flame, with long tongues of flame and a clearly distinguishable roar during operation. But this configuration is good not only, and not so much as the ability to replace logs as they burn out. This is not a monolith (like configuration 1), there are no connected or twisted elements (like in configuration 2), so you can replace any of the burnt-out internal logs with one of the spacer halves at almost any time. All that is necessary for this is to lift the dishes from the Finnish candle, take one of the supports, place it in place with the burnt inner log and lower the pot or frying pan back. The place of the support can be taken by the next half, prepared for the next replacement of logs.
The original mini-bonfire is also called a taiga, Indian, or Swedish candle. Thanks to the peculiarities of making Finnish candles and the use of intense flame, they successfully replace traditional fires on hikes, at picnics and evening gatherings in the yard. You need a minimum of tools and skills, 5-20 minutes of simple effort, and you will get a source of vertical flame with a burning duration of half an hour to 7 hours.
How to make a camping “Finnish candle” with your own hands - “My Own Inventor” Magazine
When planning an outing, be it a picnic, fishing or hiking, it’s a good idea to foresee the possibility of cooking or heating a tent in advance. The usual fire is not an ideal option. You can’t pitch him in a tent, it’s inconvenient to cook food, and he’s afraid of rain. In addition, it is also a fire hazard.
What is a Finnish candle?
It is believed that this type of fire got its name in honor of the Finn who invented it in the 30s of the last century. But other names (“Indian torch”, “taiga candle”, “Swedish fire”) suggest that more than one Finn came up with the idea.
The main option is a log with vertical cuts. It ignites in the middle and burns long and evenly.
Making a “Finnish candle” with your own hands
Manufacturing will require different tools and materials depending on the actual situation and the chosen “design”:
- chainsaw (hacksaw) or axe;
- screwdriver (drill with perk);
- wire.
When you plan to go outdoors and have the opportunity to take tools with you, an impromptu fireplace can be made on the spot or made in advance at home.
For a “Finnish candle” with cuts, you need to take a log whose height is approximately twice the diameter. These are the optimal proportions. Radial cuts are made on the log - their number may vary depending on the thickness - without reaching 2/3 or 2/4 to the bottom. The future fire is ready. You can put it in the trunk and hit the road.
To light a “candle”, you can put pieces of birch bark and thin twigs in the middle.
This “stove” is used for cooking: a frying pan or kettle just needs to be placed on top, the side cuts provide sufficient air flow for combustion. Heat from the side slots will help dry clothes or warm the tent.
To make another option, you will need a gimlet or perk. A hole is drilled down through the center of the log (3/4 of the height), the second is drilled 1/4 from the bottom perpendicular to the first.
IMPORTANT! The holes inside the log should meet
A knee-shaped channel is formed inside the log. Combustion occurs in a vertical hole, and the side one serves for ignition and air flow into the “stove”. It is convenient to set fire to a splinter wrapped in flammable material. This candle burns longer, but less intensely. It is better to place the dishes on green branches, so as not to block the air flow.
It is also more convenient to make such a design in advance.
Using an ax, another type of “Finnish candle” is made. The log should be split into 2, 4 or 6 parts depending on the thickness, slightly cut off the sharp corners in the middle part and put all the fragments together.
For stability, you can place stones on the sides or simply bury them slightly into the ground.
The disadvantage of this design is that as the logs burn out they may fall apart, so it is advisable to wrap them tightly with wire from below.
If spending the night in the forest was not planned and you don’t have any tools with you, then the role of a “candle” will be played by fragments of wood of medium thickness. They just need to be placed tightly one to the other and set on fire in the middle. This option is less practical, but makes it possible to spend the night in the forest in relative comfort.
Important! The use of coniferous trees is not advisable; due to the presence of resins in the wood, the fire will spark and “shoot.” May cause fire if used to heat a tent. Not at all difficult to make and use, the “Finnish” candle makes your holiday more pleasant, romantic and memorable.
Not at all difficult to make and use, the “Finnish” candle makes your holiday more pleasant, romantic and memorable.
Useful tips
The following recommendations will help you quickly cope with the construction of a taiga candle and avoid common mistakes:
- To create a fire, it is better to find a tree half a meter high. It should be smooth, with a diameter ranging from 10-40cm.
- The size of the log is selected depending on its purpose. For cooking, the wood should be relatively thick and short so that it is stable. A thinner one will be suitable for lighting; if necessary, it can be moved to a new location.
- The wood used must be dry. Damp logs do not burn well, smoke heavily, and it will be very difficult to light a fire.
- The number of cuts in a log can be from four to eight. The more cuts, the faster the tree will burn.
- To quickly start the combustion process, it is recommended to use any flammable liquid (for example, gasoline). It needs to be splashed into the center of the structure, then carefully set on fire.
- A long-burning fire can be built on a flat area, placed on stones or other support.
- To avoid problems with lighting a fire, when constructing a structure, it is necessary to take into account the laws of nature in advance. As you know, fire burns well only in the presence (in the required volume) of oxygen, and heated air rises quickly. Therefore, for productive combustion it is necessary to comply with the specified conditions. In particular, a gap is needed between the parts of the split log so that the flame is directed upward and there is unimpeded access of air below.
- You can stop the burning of a Finnish candle using water. For future reuse, it must be dried.
Attention! It is prohibited to pour alcohol, gasoline, or other flammable liquids into a smoldering fire. This may result in a sudden explosion of the flammable container.
Log for Finnish candle