How to choose a place for a camping tent
Tips for Choosing a Campsite / Backcountry A flat area covered in grass or sand is ideal.
If you have to camp on a hilly area, lie down with your feet down the slope at night. This will relieve swelling and headaches after waking up. Give preference to corners that are in the shade in the morning. The bright sun quickly heats up the tent, and you risk waking up from the stuffiness earlier than planned. If you find a comfortable space near trees, inspect them. There should be no dry dead branches above you. When they fall, they will damage the tent and harm you.
The reservoir should be close to the home. But you shouldn’t spend the night right on the shore, otherwise you’ll have to live next to insects and wild animals. Calculate the distance you can travel with the water container without hurting your back.
Right before setting up the tent, clean up the area. Remove everything that might get in the way: pine cones, branches, stones.
How to pitch a tent correctly in the cardinal directions. Setting up a tent
In previous articles, we learned that before setting up a tent, you need to find a suitable place. It should be smooth, without stones and snags, and also preferably near a pond and a large amount of fuel for the fire. But this is not enough, you need to be able to set up the tent correctly.
There are a lot of tents and they are all installed differently. And some modern tents almost unpack and pitch themselves. But we will start with gable tents.
The first thing you need to do is spread out the tent that has not yet been pitched, with the floor facing down. Once this is done, we stretch the lower part, but only without distortions, and secure it with stakes. Now we need two racks, they can be included in the kit or you can cut down two poles. The height depends on the size of the tent.
What you will need when setting up and dismantling the tent
These things will simplify the process, but you can do without them:
- Footprint. This is a durable fabric that is used to line the tent. Its task is to protect the bottom of the home from punctures, as well as from excess moisture and dirt.
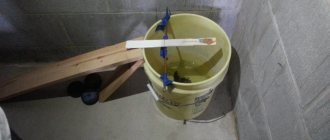
- Hammer . It is used when installing pegs. If you don’t want to take the tool on a hike, the parts can be driven in with a stone or secured by hand.
- Spatula . Helps to quickly pull out pegs that are firmly embedded in the ground.
- Rag . You will need it if you are going to clean the tent from dirt before packing.
How to assemble a camping tent
The installation details depend on the type of temporary housing, so you still have to read the instructions for your equipment. We will list the main steps A step by step guide on how to set up a tent (of any type!) / Campingmaniacs, which are the same for tents of any type.
Prepare the footprint
You can skip this point if you don’t have bedding. Spread the footprint on the ground. Normally, the area of such a floor should be several centimeters smaller than the size of the tent or coincide with it. If the footprint is larger, tuck it in - then during rain, water will not flow inside.
Set up your tent
Unfold the tent and place its base on the ground or footprint. If it is large and heavy, immediately determine where the doors are: after assembly, it will not be easy to rearrange the home as necessary.
Assemble the arcs
These are the parts that make up the frame of the tent. One arc is made of many small pipes connected by an elastic cord. Align the sections by inserting them into each other.
Attach the tent to the frame
Place the arches on the bed. If the tent is a dome type, arrange the elements crosswise. If tunnel - parallel to each other. Insert the ends of the parts into the eyelets - these are the holes at the corners of the base of the dwelling. Find hooks or cords on the fabric and use them to secure the material to the frame. If the tent is light, the procedure can be changed.
Sometimes instead of hooks and ropes, sleeves are made on the tent. Thread the bows through them before installing them into the grommets.
Secure the tent to the ground
This will help the home stay in place in strong winds. Pull each corner of the tent one at a time and secure it in place with a stake. Remember that the parts are inserted at an angle of 45°.
Install the awning
This material is not included in single-layer structures. For two-layer ones, it is needed to protect the inside from rain. Drape the fabric over the sleeping area and place it so that the doors coincide with the entrances to the tent. Fix the awning on the arches, if possible, or secure it with pegs around the perimeter of the home.
Secure the guy ropes
This will help the tent to withstand storms or strong winds. The parts (if any) are located around the perimeter of the awning. Unravel them and secure them with pegs around the perimeter of the home. Don't pull too hard.
Types of tents
When going camping, pay special attention to the choice of tent. Depending on the type of tent, they may differ in purpose, design, installation features and level of comfort during an overnight stay. In this case, the tourist must take into account all the nuances. So, tents are classified according to the following criteria.
By purpose:
Tracking.
Small products designed for light and short hikes.
This is the best option if you are planning a hiking route through the forest, on flat terrain, or near proven trails of other tourists. Tent with vestibule GROT-B 4 V2 TRT-37 Tramp 15,700 for 1 piece.
Hiking tent SCOUT 2 TRT-55 Tramp 8,800 for 1 piece. Tent Trump Arten (T0482) BTrace 1,890 for 1 piece. Trekking tent Pamir 3 RockLand 11,800 for 1 piece. Tent Scout T0201 BTrace 5,100 per 1 piece. Tourist 4-person tent LAIR 4 TRT-40 Tramp 12,100 per 1 piece. Tourist tent SCOUT 3 TRT-56 Tramp 9,600 for 1 piece. Tent Canio 3 T0232 BTrace 6,900 for 1 piece. Three-person tent LAIR 3 V2 TRT-39 Tramp 11,200 for 1 piece. 2-person tent L-3003 CAMPACK-TENT 10,550 for 1 piece. Tent Pamir 4 RockLand 12,950 for 1 piece. 2-person tent L-4001 CAMPACK-TENT 9,600 for 1 piece. Hiking tent Pamir 2 RockLand 9,800 for 1 piece. Tent Peak 2 RockLand 8,160 for 1 piece. Tent Point 3 (T0505) BTrace 8,610 for 1 piece. Trekking tent NAKRA 2 (9124.2101) ALEXIKA 25,199 for 1 piece. 2-person tent L-5001 CAMPACK-TENT 11,700 for 1 piece. Trekking tent NAKRA 3 green ALEXIKA 26,999 for 1 piece. Tent Point 2+ (T0504) BTrace 7,665 for 1 piece. Assault.
Recommended for difficult hikes, including mountainous terrain. They are easy to assemble and disassemble, they are light, reliable and spacious. The only drawback is the high price.
Expeditionary.
This is an advanced version of trekking tents. Features improved protection from wind and water. They are versatile and suitable if you are planning any hike in the mountains, forest or plain.
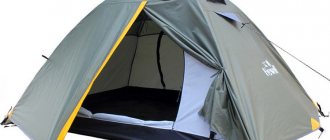
Camping.
The preferred option for tourists who prefer long trips and vacations in one place for three to four days.
They are distinguished by good spaciousness, comfort, the presence of comfortable hallways and the presence of thoughtful ventilation. The only deterrents are the weight and high cost. Four-person tent BORNEO-4-G green Premier Fishing 13,370 for 1 piece.
Tent Meteor Green (120357) EASY CAMP 7,829 for 1 piece. Camping tent CHALE-4 Premier Fishing 21,380 for 1 piece. Tent tent Rest (T0466) BTrace 9,345 for 1 piece. Tent Tube 4 (T0508) BTrace 17,010 for 1 piece. Tent BORNEO-6-G green PREMIER Premier Fishing 17,105 for 1 pc. Family tent TYPHOON-3 (HS-2450-3) Helios 15,640 for 1 piece. Quick-assembled tent Home 4 (T0513) BTrace 20,895 for 1 piece. Tent Ruswell 4 (T0263) BTrace 20,500 per 1 piece. Two-room tent BREST 4 TRT-82 Tramp 20,500 for 1 piece. Tent Sunrise 4 GreenLand 12,000 per 1 piece. Camping tent SPHINX TRT-88 Tramp 17,500 for 1 piece. Family tent BELL 3 V2 TRT-80 Tramp 13,800 for 1 piece. Camping tent BELL 4 TRT-81 Tramp 15,500 for 1 piece. Two-room tent VICTORIA 10 (9156.0301) ALEXIKA 58,599 for 1 piece. Tent ANCHOR 4 (SLT-032.06) SOL 13,500 for 1 piece. Tent Double 4 (T0509) BTrace 13,800 per 1 piece. Tent Birdland Arten (T0488) BTrace 8,715 for 1 piece. Tent Gemini (T0487) BTrace 11,865 for 1 piece. Tent Prime 4 (T0511) BTrace 43,000 per 1 piece. Tent with vestibule Laguna 4+ RockLand 19,600 for 1 piece. Tent Newest 3 (T0510) BTrace 26,000 for 1 piece. Tent BALTIC WAVE 5 V2 green (TRT-79) Tramp 17,900 for 1 piece. Tent Apache 3 V2 green (TTT-023) Totem 8,390 for 1 piece. Special purpose.
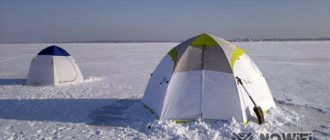
This category includes overnight accommodations for fishermen, military personnel, children, winter tourist outings, etc. They are selected individually, taking into account the situation.
By shape and design:
Half barrel.
Externally it looks like a barrel cut lengthwise and in half. This design provides optimal capacity; if properly stretched, a high-quality half-barrel will withstand very strong winds. For fastening, arcs are used, which are installed in parallel and must be additionally secured with spacers.
Hemisphere.
This form is suitable for both simple and complex forays. Pros: ease of installation, stability. Fixation is carried out through several arcs crossed with each other.
Gable type.
This type of tent was popular during the Soviet era. Outwardly, it resembles a small house, has an affordable price, is lightweight and very compact. But travelers don't like it because of installation problems, poor wind resistance and difficulty finding a place to mount.
By number of layers:
One.
The design of such a tent implies the presence of one layer of material. This option is suitable if you are planning a long hike in difficult conditions, when you need to reduce the total weight of your things and quickly set up a camp in difficult conditions. The downside is poor ventilation, which is especially important for budget products. Travel stores are trying to supply new models of such tents with additional ventilation windows and special membrane fabric.
Two.
Today, almost no professional tourist trip is complete without a double-layer tent. It has a high level of comfort thanks to its two layers. The first reliably protects from natural phenomena, and the second allows clean air to pass through and eliminates the accumulation of condensation. Such structures have windows for ventilation.
By seasonality:
For summer.
They are used when a tourist is planning a hike in good weather conditions. Use in low temperatures, windy or stormy weather is not recommended. Pros: accessibility, small size, optimal ventilation.
For three seasons.
Such awnings are designed for all seasons of the year, except winter. Protects in cool weather, saves from rain and wind.
All-season.
Awning manufacturers try to supply universal products suitable for all seasons and year-round use. They are resistant to all the whims of nature and even have special “skirts” to retain heat, protect from snow, wind, debris, etc.
To choose the right tent, it is important to focus on many criteria: time of year, number of places, duration of rest, weather, etc. In each case, the decision is made individually.
How to fold a camping tent
If you disassemble and pack the product carelessly, you may damage the fabric or parts. Here are the instructions How to fold a tent: doing it the right way! / Hikingmastery, which will help keep your equipment intact.
Remove the trash
Shake off any debris, food crumbs, and soil particles from your sleeping area. Also be sure to make sure the tent is dry, otherwise it may become moldy. If necessary, wipe it with a cloth.
Take out the pegs
Dig up parts that are firmly embedded in the ground with a shovel. Wipe the elements with a cloth and pack them in a separate bag. Pegs scattered randomly throughout a tent bag can damage the fabric.
Remove the awning
Fasten all clasps on the product. Unhook the material from the arches if you fixed it to them. If the fabric seems damp, dry it by throwing it on tree branches. If possible, do not place the awning on the ground: the fabric may become damp.
Dismantle the arches
Unhook the inner or single-layer tent from the poles. Carefully remove the ends of the frame from the eyelets. Divide the arches into sections and place them in the case.
Shake the tent
This will help remove debris that was not noticed and collected at the first stage. After the procedure, a single-layer tent with which the footprint was not used must be dried and wiped. Especially if the bottom is not made of oilcloth material. If possible, do not place equipment on the ground. When you're done, make sure all the zippers are fastened.
How to assemble a military tent. Assembling an army tent
Soldier camp tent
PLS tent TU 8586-001-00303516-93 (Soldier's Camp Tent) The PLS army tent is a lightweight tent for 10 people. The tent is single-layer and is not intended for use in the autumn-winter period. The tent is placed on a pre-made “nest”. The PLS tent has a four-slope roof, sloping walls, one entrance, which is closed with a valance and brakes. Equipment: External tent (tent canvas art. 19-EX), stakes, racks and guys. Tent packaging: soft part in a cloth bale, stakes in a wooden box, poles are tied separately. The total floor area of the tent is 16.50 square meters.
Tent capacity: 1. When placing people on separate beds: 4-6 people; 2. When placed on a common deck: 8-10 people;
Contents: 1. Tent basting - 1 pc., - wooden side posts - 4 pcs., - wooden middle stand - 1 pc., - metal stakes (equal-flange steel angle 40x40x5) - 4 pcs., - rope guys - 4 pcs. ,
Main dimensions of the tent: - length 4.07 m. - width 4.07 m. - side wall height 1.75 m. - ridge height 2.75 m. - floor area 16.50 sq. m.
Weight and packaging:
1. External tentorium - 9 kg. Rolled up and tied with rope, 2. Rope guys - 1 kg. 3. Central stand - 2 kg. Folds into a bundle and tied with rope 4. Side stands - 6 kg. 5. Metal stakes - 6 kg. Placed in a wooden box 6. Packaging container - 5 kg. Total weight of the tent with packaging: 27 ± 5 kg.
INSTRUCTIONS for the operation and installation of a soldier's camp tent TU 17 RSFSR 13-7257-88
1. The procedure for setting up a tent.
The soldier's camp tent can be installed with or without a nest. The nest for installing a soldier’s camp tent should have linear dimensions of 4x4 m. The walls of the nest should be sloped 0.6 m high from the floor. They can be made from boards, poles, or earthen. From the side of the entrance line, at a distance of 1.35 m from the right corner of the nest, an entrance 0.65 m wide is made with a door. In order to prevent rainwater from flowing into the tent, the earthen floor of the nest should be raised by 10-15 cm. To drain rainwater around the perimeter of the nest at a distance of 20-25 cm from it, it is necessary to dig a groove 20-25 cm deep and 25-30 wide cm.