Box connection "Dovetail"
The classic “Dovetail” on the corner connection of the box sides fascinates with its Beauty thanks to the contrasting colors of the coating on the same material. Combined with the high strength of the connection, this has made this type of connection widespread among cabinet makers.
The use of natural oils for painting wooden products allows you to tint even the most pine so that it looks like expensive wood.
Playing on contrasts as in the photo below: a combination of different types of wood, different colors, and a dovetail joint made with wide tenons and narrow spaces between them creates the best visual effect. This connection is made manually and the photo shows the high precision of execution!
This connection is made manually and the photo shows the high precision of execution!
Only five tools help an experienced Master with this:
- thicknesser with precise adjustment,
- miter box (template) setting the angle of the tenon,
- axing saw - tenon saw,
- chisel for aligning the groove
- and a plane for final trimming of tenons.
View Set of tools for making box tenons “Dovetail” 1: Butt saw, Chisel, Planer, Thickness planer, Angle templates View Set for making box joints INCRA I-Box PROMO 2: Milling table M-RT COMBO 4 plus I-BOX tenon cutter plus a device for making wooden hinges KIT for making a tenon joint: Classic backed joiner saw Dovetail 20tpi PLUS Veritas thickness planer 150 mm PLUS Flat chisel NAREX PREMIUM 20 mm 05T0505-05N3631-811670-AM
Another solution for making a box joint is with protruding tenons with a chamfer. This solution adds volume
The originality of this solution is that all the bottoms of the grooves lie not on a straight line, but on an arc. Therefore, this connection is performed exclusively with hand tools.
A combination of contrasting colors made with different types of wood always looks beautiful! In the photo below we see a composite Dovetail joint made with an additional plug-in third element.
The connection looks complicated and expensive.
If you give the outer walls of the box a radius (convexity), the connection becomes even more interesting and beautiful.
The photo below shows a permanent box dovetail joint on a rounded corner. This connection differs from a standard corner joint in that the original workpiece must be much thicker to provide a radius at the corner. Subsequently, a large amount of material is removed. Finished products with this connection demonstrate a serious level of craftsmanship. But at the same time, a lot of material “goes into the trash.”
Video of making a rounded corner with a dovetail joint:
In addition to the open Dovetail connection, a semi-open Dovetail (not through) is often used. Here the spikes protrude partially only on one sidewall.
By playing with the width of the spike and its size, you can achieve new visual effects.
A corner connection, where the façade board has a curved surface, can be played out like this:
Making a dovetail with your own hands
Making a dovetail is not difficult, but you should prepare everything you need in advance: drawing, tools, materials.
If you plan to use the fastening on large-sized elements, for example, when building a house, then you should definitely make a calculation for the dovetail connection: decide on the type, number of tenons, angle of inclination, etc.
Lack of skill can be a problem as this type of joint is quite labor intensive and requires some skill to ensure the finished product looks beautiful while remaining strong.
Tools and materials
To create a corner dovetail joint from materials, you only need wooden blanks (board, timber) and good quality wood glue.
If the outer corners of a building are joined, it is additionally recommended to use sealant to fill cracks and gaps.
To cut tenons and grooves you will need the following tools:
- Ruler and square.
- A simple pencil.
- Knife.
- Chisels (length will depend on the size of the workpieces).
- A workbench with a clamping vice or with additional clamps.
- Saw (band saw, axle saw, circular saw, jigsaw - depending on the type of connection chosen).
- Hammer and mallet.
- Equipment for grinding (file, machine, sandpaper).
To make it easier to cut out the tenons, you can use a template by cutting it out of thin sheet metal in advance.
Dovetail tongue and groove connection
The next connection where the Dovetail is used is a tongue-and-groove connection. This connection was previously common in the manufacture of cabinets, sideboards and other furniture.
The tongue and groove may have a shape other than trapezoid:
Application area of dovetail connection
This type of fastening is intended for wooden parts, and therefore is used mainly in 2 areas: construction and furniture assembly.
Construction
Dovetail was invented when there were no wood glues and fasteners yet. It is still used in the construction of wooden houses, bathhouses and other buildings due to the reliability and strength of fixation of elements and the ability to impart the necessary rigidity to the structure. It is used to connect profiled timber or logs into the crowns of a log house. The joints fit so tightly to each other that heat loss in the finished house is minimal.
Furniture manufacture
Most often, this type of fastening is used in carpentry to connect parts of drawers made of solid wood or plywood, as well as:
- tables;
- cabinets;
- whatnot;
- shelves;
- caskets;
- chests and other furniture.
Frame connections of beams in Dovetail
The Dovetail connection has also found widespread use in carpentry work in the construction of frame wooden structures. Such a connection requires high manufacturing precision:
Connecting several converging beams (rafters) almost always turns out to be a technically difficult task. Especially if you need to make the connection detachable, but at the same time strong and reliable. In this case, 8 beams (rafters) are combined into a single structure using a dovetail connection. In such designs, grooves and tenons are made using a hand router and templates. Any roof that has a multifaceted or round slope in plan (for example, the roof of a gazebo or tower) can be made according to this scheme. A complex compound used in wooden frame and half-timbered housing construction. Insertion of vertical and horizontal beams in the middle of the beam.
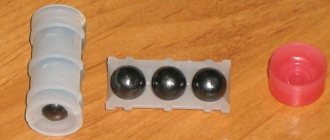
Rings or monoblock?
A monoblock is preferable ; it fixes the sight better. Rings are a necessary measure if the sight is non-standard or the mounting location for the optics is located inconveniently.
Sometimes the problem is solved by a monoblock “with removal”. It should also be noted that the rings, due to their non-rigidity, reduce the impact load on the optics. A serviceable rifle does not overload the scope, but no one is safe from blank shots.
And yet - a candy bar! There will be fewer problems with accuracy.
Don't forget that sights at mounting points come in two diameters: 1 inch (25.4 mm) or 30 mm.
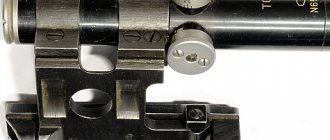
Consider the dovetail mount (in English dovetail - “dove tail”). They are usually 11mm wide, or a combined dovetail + weaver, 21mm wide.
I understand that this is a holivar question. But I'm leaning towards a candy bar.
"Dovetail" in use for benches, stools, tables
The photo below shows a bench made of spruce that has lain outdoors for 20 years. An oversized dovetail connects the oversized legs to the bench, making it solid and strong without any glue or screws:
This connection has become widespread in the manufacture of workbenches:
Frame structures can also be connected to a short but wide tenon - Dovetail
The photo below shows an original solution for inserting table legs into the tabletop. And again “Dovetail”! But in a completely different design: here the spike consists of two symmetrical parts. Original, beautiful and reliable.
And this is how a hidden carpentry joint is made. After assembly, the connection itself is not visible:
The Dovetail compound can sometimes be found in the most unexpected places. For example, on the railing:
Dovetail plank
Without optical instruments and various aiming devices, illumination, etc. Now you can't get by on the hunt. All these devices not only increase its effectiveness, but also make hunting more exciting and interesting. There are a number of different attachments and mounts available to mount these scopes to your weapon. Among their wide variety, the most popular is the Dovetail plank. It attracts with its simplicity, reliability and the ability to install on various types of weapons.
The Dovetail strip is a metal plate with longitudinal slots on both sides. This design is very convenient, versatile and lasts quite a long time. Sometimes Dovetail slots are cut directly on the receiver on the gun, and in this case the optics are mounted on rings or a monoblock directly on the weapon without the use of additional adapter strips. Longitudinal slots in the dovetail are made at an angle of 45, 55 or 60 degrees. The width of the upper part is made in different sizes by different manufacturers. So in the Turkish version it is 6 mm, in the Czech version - 19 mm, in the Russian version - 11 mm. Therefore, to unify the fastening, manufacturers produce adapter brackets. According to the shape of the upper part they are:
- rounded;
- flat.
The straps with a rounded top are a continuation of the circumference of the receiver. This form is not always justified or convenient, since most devices have a flat bottom surface, which creates problems when installing optics. There are many different fastening options available for flat, sanded surfaces. In addition to the upper fastenings of the Dovetail strap, side options are also widely used. For this purpose, adapter side brackets are used, including those for Picatinny and Weaver rails. To ensure stable installation of the devices to prevent them from slipping during recoil, locking elements are provided in the bar. They are performed in the form:
- retaining wall;
- locking pin;
- locking hole.
The retaining wall is a monolithic elevation with the main part at the end of the bar. When attaching optical elements, their brackets are installed, pressing tightly against the retaining wall. In the pin version, the hole provided in the bracket is put on it. When mounted with a hole in the base, a retractable corkscrew is provided, which is installed in this hole. A fourth option is possible to prevent the optics from sliding during recoil - this is a limited length of the grooves. They are not completed to completion, but gradually fade to zero. When installing the brackets, they are moved towards the end of the slot, thus locking. This is a very widely used stopper option that provides a secure fit. Most often it is used in versions with a rounded top. You can purchase Dovetail strips, as well as various brackets for them, in our online store Sledopit.by. Our experienced consultants will present you a wide range of our products; they will also give comprehensive advice on their use and installation and help you make the right choice. You can place an order for the selected product directly in the store, receiving it immediately, or by phone. Our courier service will deliver your order to the specified address on time. We will be glad to see you in our store and are always ready to provide you with the necessary assistance.
More complex shaped connections
A variety of shaped tenons can be made using a router and a special tenon-cutting device - a tenon cutter
But such connections can only be made with special templates
using a tenoning device - Leigh tenoner:
Do-it-yourself technology for joining parts using dovetail
To make this fastener yourself, you need to accurately design the dimensions of the tenons and grooves, taking into account the load on the parts and some other factors. To facilitate the work, you can use ready-made templates and drawings.
To work you will need:
- Reimus;
- chisel;
- carpenter's square;
- mallet;
- fry;
- jigsaw;
- axing saw;
- pencil.
What to consider when designing a connection
When creating a drawing, you should calculate the distance between the tenons. The greatest strength is provided by spikes located at equal intervals from each other. However, cutting out the elements will take a lot of time. Most often, a 2 to 1 or 3 to 1 scheme is used - this is quite enough to securely fasten the elements.
Important! When fixing long parts, you will need to make additional tenons along the edges to prevent warping of the wood.
It is also important to determine the angle of the studs. For soft woods, proportions of 1:6 are used to prevent deformation, for hard woods - 1:8.
Marking
It must be done as accurately as possible - the strength of the connection depends on this. For this work you will need a square and a grinder. To make the task easier, you can use a special template. There are different types designed to create angles of different sizes depending on the hardness of the wood.
Work begins by marking and sawing out the side on which the spikes will be located. Subsequently, it will be used to transfer the drawing to the side where the spikes are located.
Using a rimus, draw a line of shoulders and apply them on all 4 sides. Using a template or a carpenter's square with a sharpie, mark the contours of the tenons at the end, then on the front and back sides of the part. Areas of the board that need to be removed are marked with a cross.
Cutting grooves
The grooves are cut using an axle saw. First, make even cuts up to the shoulder line. To avoid curvature, the blade must be held perpendicular to the end and moved with your hand evenly, without sudden movements.
Curly dovetail or butterfly dovetail
The key can also be angular when connected with a miter:
Classic "Butterfly":
Master at work (places for dovetails are marked):
Review of slab products: examples, processing technologies and manufacturing tools. Update 2020
More photos of dining tables made of slabs of wood with contrasting inserts