DIY prefabricated sailboat
Dear visitors to the site “Visiting Samodelkin,” from the master class presented by the author, you will learn how to independently make a prefabricated sailboat consisting of four parts from plywood and fiberglass with epoxy resin.
This collapsible boat was made by the author so that it could be freely transported in the cabin of your own car, despite the fact that in the assembled position it has a length from stern to bow of 330 cm, that is, more than 3 m and a width of 125 cm, the sailing mast is also collapsible, and the sail itself is made of special fabric and is simply folded into a corner during transportation.
The hull of the boat is made of plywood and coated with fiberglass impregnated with polyester epoxy resin. First, the hull was modeled in a special 3D program on a computer, then a cardboard mock-up was made and glued together as a prototype of the future boat - this helped to anticipate some errors and to preview and gain a deeper insight into the essence of the upcoming work.
Plywood blanks are fastened together with plastic clamps. The boat itself is prefabricated and consists of 4 separate parts that are assembled together into a single whole. The joint is made in the form of a groove with a silicone gasket and when all the locks are clicked, the halves fit very tightly to each other, thereby water does not leak through the joint. The hull, finished with fiberglass, is very reliable, but is afraid of direct sunlight, so it is advisable to paint the boat at the end of the work in a sun-protective color, for example white.
And so, let's take a closer look at how the author created a sailing boat and what exactly did he need for this?
Materials
1. plywood 6 and 4 mm 2. epoxy resin 3. fiberglass 4. plastic clamps 5. sail fabric 6. mast (bamboo) 7. batten 8. locks 9. silicone seal 10. sealant
Tools
1. jigsaw 2. drill 3. brush 4. utility knife 5. hacksaw 6. grinder 7. ruler 8. screwdriver 9. program for creating 3D models on a computer 10. rasp
Step-by-step instructions for creating a prefabricated sailboat with your own hands.
First of all, the author made calculations and compiled a model of the future boat on a computer using a 3D program. The work ahead is difficult and you need to calculate everything in advance in order to make as few mistakes as possible in the future.
As mentioned above, the boat is prefabricated and has 4 parts that easily fit into the interior of a passenger car.
A three-dimensional model of the future sailboat has been compiled. After which, having a 3D model, a prototype was made from cardboard, this was necessary in order to gain practical experience before starting serious work and in the future to make as few mistakes as possible. Next, a pattern is made from plywood. The body is assembled from plywood and tightened with plastic clamps. The boat hull is finished with fiberglass and impregnated with epoxy resin. And now the boat is ready, you can move on to testing.
This is the compact sailing boat our author came up with; we remind you that the length in the assembled position is 330 cm, and the width is 125 cm plus the sail and mast. As you can see, if you wish, you can make your own boat even from ordinary plywood, which will be no worse than the factory analogue, and most importantly, it will be very affordable. Step-by-step instructions have been provided to you, so let’s go ahead and do it! go for it friends!
That's all, thank you all for your attention! Come visit often and don't miss out on new items in the world of homemade products!
Source
Become the author of the site, publish your own articles, descriptions of homemade products and pay for the text. Read more here.
DIY water sail-anchor
DIY water sail-anchor
A water sail is a product in the shape of a cone or pyramid with an open base. The base consists of a metal hoop or cross, four slings are attached to it for attachment to the anchor rope. The anchor is pulled by a pull cable attached to the top of the sail. The anchor-sail has a special buoy for lowering and lifting the structure into the water, as well as determining its location in the water.
Modern water sails have two main functions: the first is to help a raft, yacht or boat stay afloat and not capsize from waves and wind, and the second is to slow down the drift of the craft. When making a sail for a PVC boat with your own hands, you should keep in mind that the length of the anchor cable must correspond to the wave period and be at least five lengths of a small boat. It is made from nylon twisted into three strands.
The length of the anchor-sail itself should be from two to four meters; these dimensions depend on the size of the PVC boat.
The diameter of the sailing dome is approximately 120-150 cm; in its center there must be a hole for water entry, the diameter of which can be adjusted using a cord. Slings allow you to regulate the speed of the craft. The material from which the sail is made directly affects its service life. It can be made of thick polyethylene or dense water-repellent fabric. The effectiveness of a water sail depends on the length of the anchor cable - the longer it is, the more efficient its use. If the length of the sailing lines is 1.5 meters, the correct cable length is considered to be 10 meters. A weight is attached to the bottom of the anchor.
Frame
The first step is to make a board - the body of the product. You can see the dimensions of its parts and the principle of their relationship below in Figure 1.
Keelsons
When making a surf with your own hands, we take plywood and cut two keelsons. They can be made using a regular saw. For convenience, first draw the outlines of one keelson and cut it out, and make the second board in the image and likeness of the first.
The keelsons need to be connected along the contour. This is done using slats. Don't forget that the product will have a mast. Leave room for her. The future level of controllability of the surf depends on how you secure the mast and centerboard.
When creating the board, be sure to cut small holes in the keelsons. This will help the device ventilate in the future.
Most likely, the sheets of plywood you purchased will not be long enough to create a solid structure. But the board can be glued together. Use a rasp to process the parts to be glued. The gluing areas need to be processed so that they become rough (this will increase the level of adhesion). After this, grease the edges of the board with epoxy glue and connect the sheets of plywood. A rod can be inserted between them to determine the internal height of the projectile. Overlapping areas of the plywood structure must be nailed down. When the workpiece dries, the sharp tips of the nails will need to be bitten off. The lath is also removed when dry.
Deck and bottom
You can also make them yourself. This is done according to the drawings. These cut parts must first be glued to the keelson and then secured with nails. Please ensure that the fastenings are located from each other at a distance not exceeding thirty centimeters.
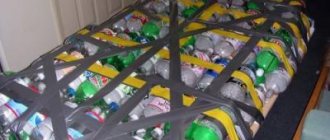
The sides need to be filled with construction foam. In the worst case, you can use the packaging form of this material.
Lubricate the foam with epoxy to secure it. Glue must be applied to each piece. After this, the material should “look” behind the board by half a centimeter.
When the glue dries, you will need to give the foam an oval shape. This is easy to do with sandpaper.
The resulting structure must be “packed” in fiberglass. You can use a wood stapler for this.
Holes
After upholstery, it is necessary to prepare holes in the places to which the fin, steps and centerboard will be attached.
Painting
Now you can give the device the desired appearance by painting the board with waterproof paint. If you saturate the plywood with drying oil after painting, it will last longer.
To mark the second triangle, draw an arc with a radius of 2800 mm from the clew in the same way. The point of its intersection with a notch with a radius of 1240 mm will be the fourth - knock-benzel - angle of the sail.The plaza turned out to be a flat sail, but for it to work well, it must be supplemented with convexities - sickles. The sickle sizes are different for different types of sails.
The correct aerodynamic shape in an average wind will have a quadrangular sail, in which the size of the sickles is: along the luff 2% of its length, along the lower - 3-5% and along the back up to 7%.
Setting aside the height of the sickle from the middle of the luff line, we draw smooth curves to the corners using a flexible strip pressed to the floor with weights.
To construct a sickle along the luff, its straight length must be divided into three equal parts and perpendiculars must be restored to these points. Set aside 200 mm on the upper perpendicular, and 160 mm on the lower one. These two points must be connected by smooth curves with angles, and between themselves - by a straight line.
When starting to cut fabric, you need to remember one important circumstance: natural (plant) fabric will stretch across (along the weft) over time and shrink along (along the warp) of the panel.
Therefore, so that in the future the height of the sail does not exceed the height of the mast, it must be shortened in advance (the stretch is usually 4-5% of the luff length).
Excessive shrinkage can be prevented if the fabric is wetted, dried and ironed before cutting.
We mark the fabric with a pencil in two straight stripes into three equal parts, fold it along each line and stitch it on a sewing machine so that a false seam fold 15 mm wide is formed.
We bend the false seams towards the main panel, iron them and sew them with a zigzag seam.
We sew the second false seam of the panel in the same way. We transfer the roll of fabric with sewn false seams to the sail area and roll it out perpendicular to the luff, starting from the tack angle.
Having slightly stretched the panel and smoothed out the wrinkles on it, we secure it with awls in the corners and cut it off from the roll, leaving an allowance of 50 mm along the luff.
We lay the second panel so that its lower edge overlaps the upper edge of the first by 15-20 mm, and we also cut it along the luff with the same allowance.
When only the areas at the luff and the boom remain uncovered, we cut them out, leaving allowances for the hem of the luffs up to 60 mm and for the overlap at the seams -20 mm.
After trimming the edges of the panels, you need to bend the longitudinal edges. This is done using a steel ruler.
Having bent the edge of the panel removed from the plaza by 5-8 mm, it should be immediately ironed with a hot iron.
In each connection, we bend the edge of one panel up, and the adjacent edge of the other down; when placing one edge on another, both folded parts must be inside the seam.
We lay the panels again on the plaza, carefully align the folded edges so that the width of the seam after placing the panels with their edges on top of each other is 15-20 mm.
Now the panels need to be swept away by hand or joined with rubber glue. The “glued” sail is sewn on a machine without wrinkles or folds.
Sails are sewn on household machines using a zigzag seam with the largest possible pitch. This seam is quite strong and pulls less on the fabric. The needles (usually No. 90-120) must be very sharp.
When sewing, the top thread must be loosened enough so that the seam does not tighten, but holds the fabric. For the main seams, we can recommend cotton threads No. 20 or No. 30 (depending on the thickness of the fabric), and for secondary seams No. 30 or No. 40.
It is advisable that the threads be of a contrasting color with respect to the fabric, for example, for white fabric - brown, and for dark fabric - white. Any break in the seam becomes immediately noticeable.
We transfer the spent sail to the drawing, secure it with awls at the corners and finally cut it around the perimeter. We bend the edges of the luff, except for the back one, so that the edges of the fabric are again inside the seam. We iron the folds with an iron, and secure the seams with rubber glue or hand basting.
We cut the luff with an allowance of 8 mm only for the hem of the edge. In order for the luff to stretch evenly with the entire sail and not bend to the leeward side, we sew a strip of fabric 40-50 mm wide to it - the so-called fake. Leave 10 mm for the hem of the luff.
We sew the bent luffs and the fake on a machine, then we sew boots on the corners of the sail - linings made of the same fabric in the form of sectors. For each corner we cut out two boots - one (inner) with a radius of 150-200 mm, the other (outer) with a radius of 200-250 mm.
We do not bend the edges of the inner boot - they are covered by the outer boot, the edge of which is bent by 5-8 mm, after which we iron the entire package and stitch it around the perimeter.
To prevent the luff from bending under the wind, it needs to be reinforced with two or three battens made of thin lath 500 mm long and 40 mm wide.
The battens are inserted into pockets sewn onto the sail. We cut out the pockets 5 mm wider than the batten and take into account the folding of the fabric, and at the luff itself we increase it to double the width of the batten.
Along the luff we sew the pocket from below only half the height. The armor inserted into the pocket rests against its sewn part.
We install eyelets at all four corners of the sail to strengthen the edges of the holes. We bend a ring with a diameter of 20 mm from brass wire with a diameter of 2.5 mm, place it on the hole in the sail and stitch it with sail thread, tightly laying the turn to the turn.
The hole in the fabric should be 10 mm in diameter so that the remaining edges can be wrapped into a ring.
We install such eyelets along the front and lower luffs at a distance of 250 mm from each other to lace the sail to the mast and boom, as well as on the reef bow for taking reefs.
G. Novak, Leningrad
About boats
More about sails:
1. How to choose fabric and sew a sail.
2. Use of the sail (sails and rigging, turns, dimensions). Chapter XIII. § 61.
3. How to sew sails for a small boat.
4. Sail for an inflatable boat.
5. Board under sail. Windsurfing.
6. Tourist water equipment. Collapsible sailing ships.
7. Inflatable boats. Designs, manufacturing.
8. Sails and equipment of the vessel.